
Enter the Infrared

Infrared photography is a fun and fascinating sub-genre of film photography and one well worth exploring. This style of photography has been popularized by such legendary films as Kodak HIE and Kodak EIR/Aerochrome. The former a high speed black and white infrared film that was discontinued in the early 2000s and the latter a discontinued color infrared film that has been made famous by photographers such as Richard Mosse and is still emulated and sought after by eBay enthusiasts. But even if the two most famous infrared films ever are no longer being made, the current film market offers many options for infrared photography - likely far more than you realize!
Before we get into those specific film stocks and tempt you to run right off and start shooting, we want to cover some of the basics of infrared photography to prepare you for success as best as we can. So bear with us and read just a bit farther before heading off with those fresh rolls of film.
The first thing to understand is what we are talking about when we say a film is infrared sensitive. Essentially the human eye can see a very narrow band of the electromagnetic spectrum. We usually refer to this as the “visible light” portion of the spectrum and it runs between wavelengths measured from about 380nm (violet) up to 700nm (red). The portion just below our sight at the 380nm range is the ultraviolet spectrum and the portion just beyond the 700nm end is the infrared spectrum. Basically, an infrared film is capable of seeing beyond that 700nm limit that our eyes can see. Just how far it can see depends on the film. Most infrared films can see up to about 800-850nm. These films are also referred to as “superpanchromatic” as contrasted against your standard “panchromatic” film that, like the human eye, only sees the visible portion of the spectrum.


Almost all films are produced with a published Data Sheet that includes all sorts of technical notes regarding that film stock. One part of these data sheets is a spectral sensitivity chart that tells you what portions of the spectrum a film can see. In the above images you see the spectral sensitivity chart for Kodak Tri-X on the left and the one for Rollei Infrared on the right. Knowing that the visible spectrum runs from 380-700nm you can see how Tri-X’s sensitivity to light drops off right about 670nm, or deep into the visible red portion of the spectrum. Meanwhile Rollei Infrared can see light as far out as 780nm, meaning it can see some infrared light. (As a side note, these data sheets can often tell you some interesting things about film that are not immediately obvious and are always worth looking over.) As a technical aside, this portion of the infrared spectrum that Rollei Infrared dips into is more specifically known as “Near-Infrared”. Near-Infrared wavelengths run from about 800nm out to 2500nm and all infrared-capable films operate at the close end of this spectrum. We only point this out because some people confuse near-infrared sensitivity as not being “true” infrared sensitivity, but no infrared films are capable of seeing anywhere beyond near-infrared.
So you have a category of films that are capable of seeing beyond the 700nm limit of visible sight. Great! That is what characterizes an infrared film. Now the next step is figuring out how to use them to make infrared photos!

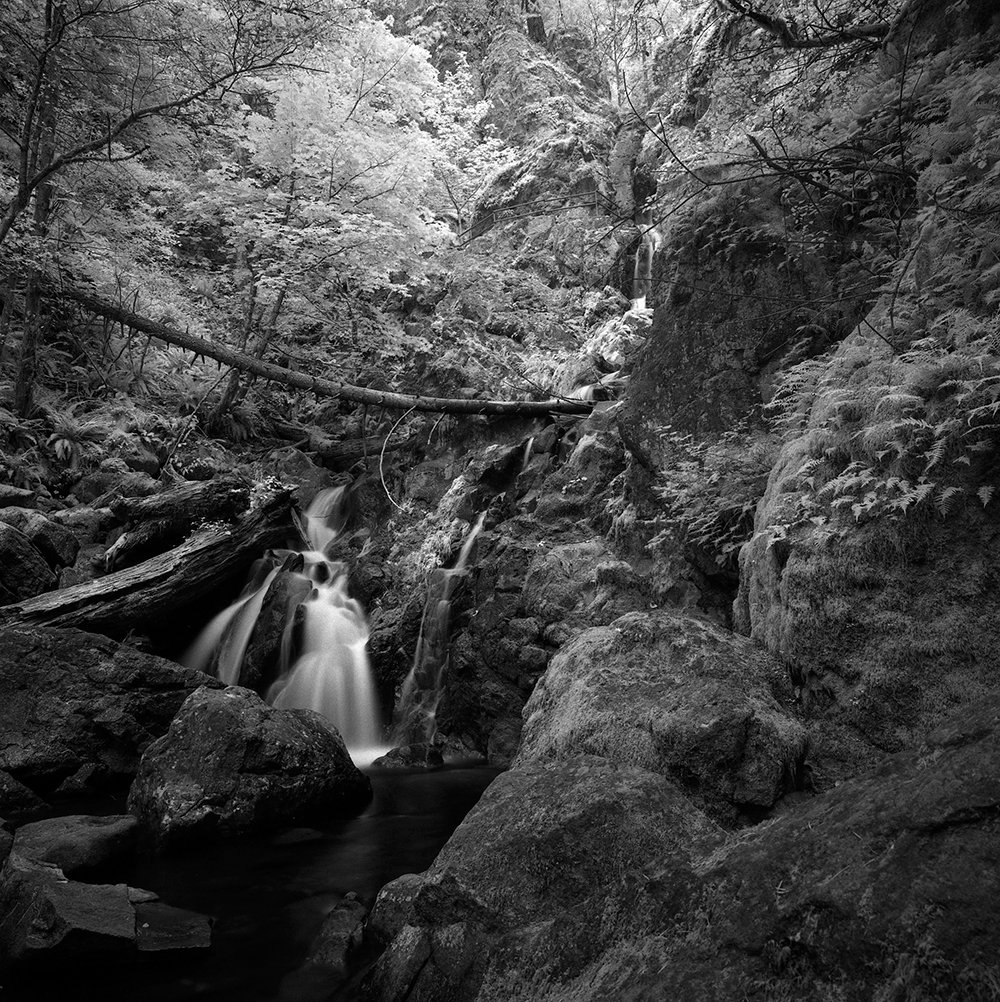
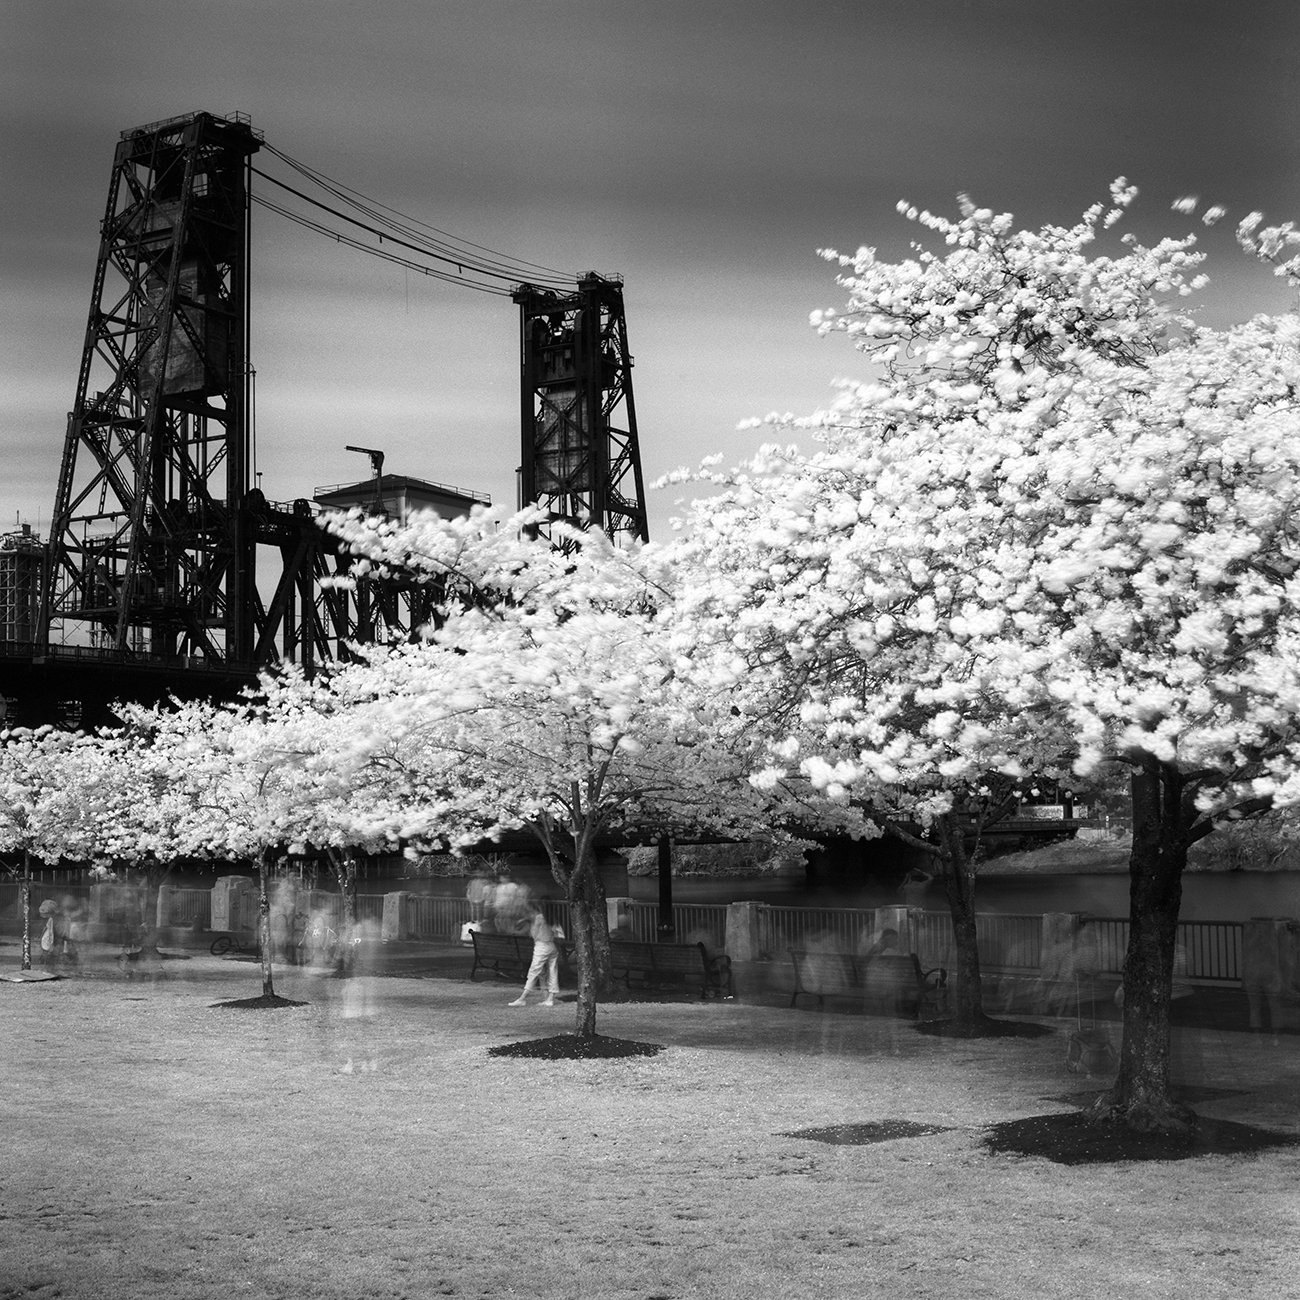
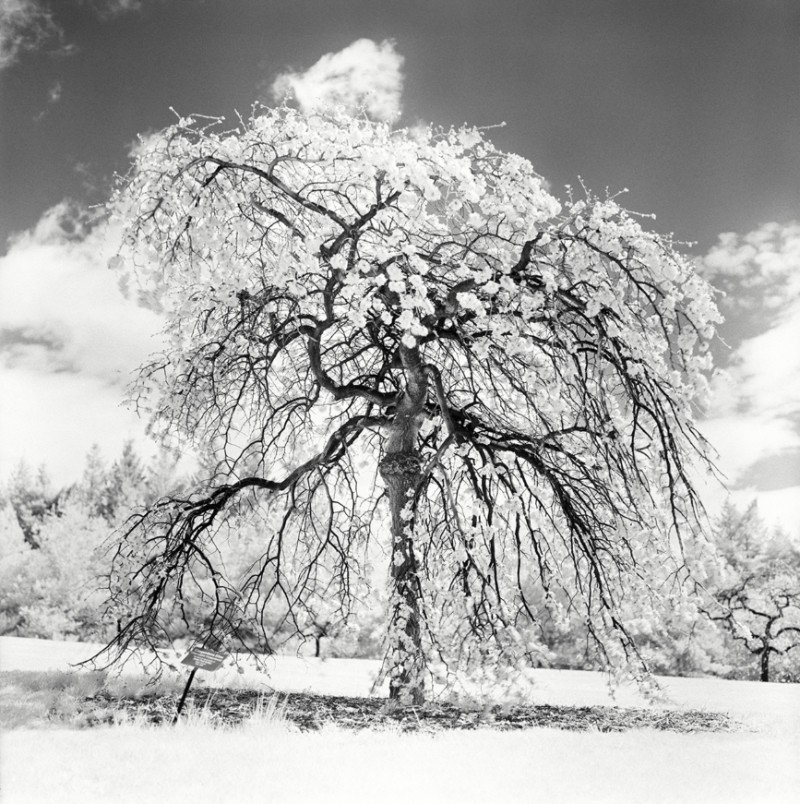
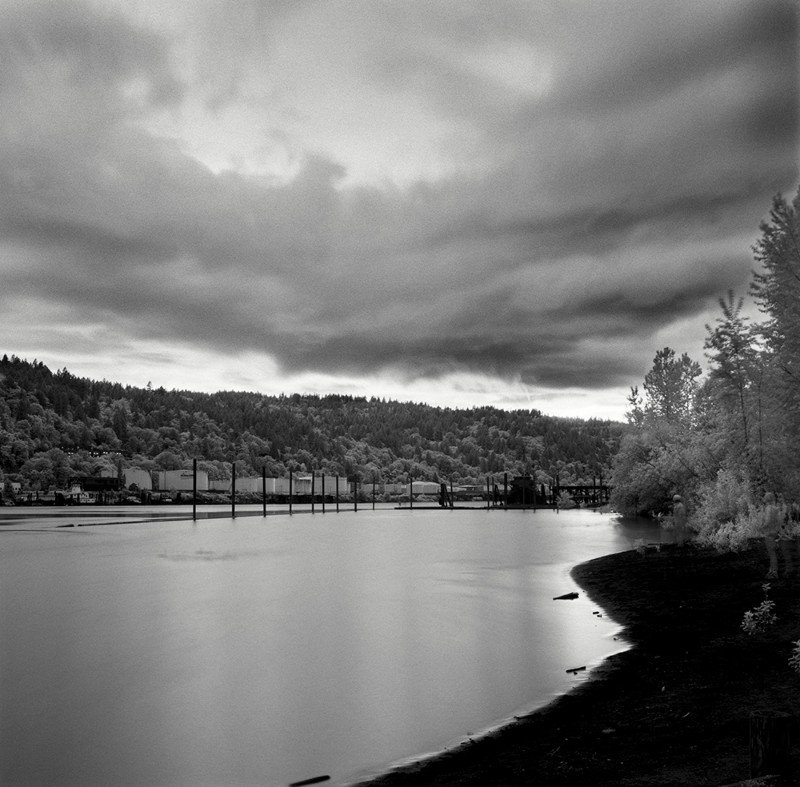
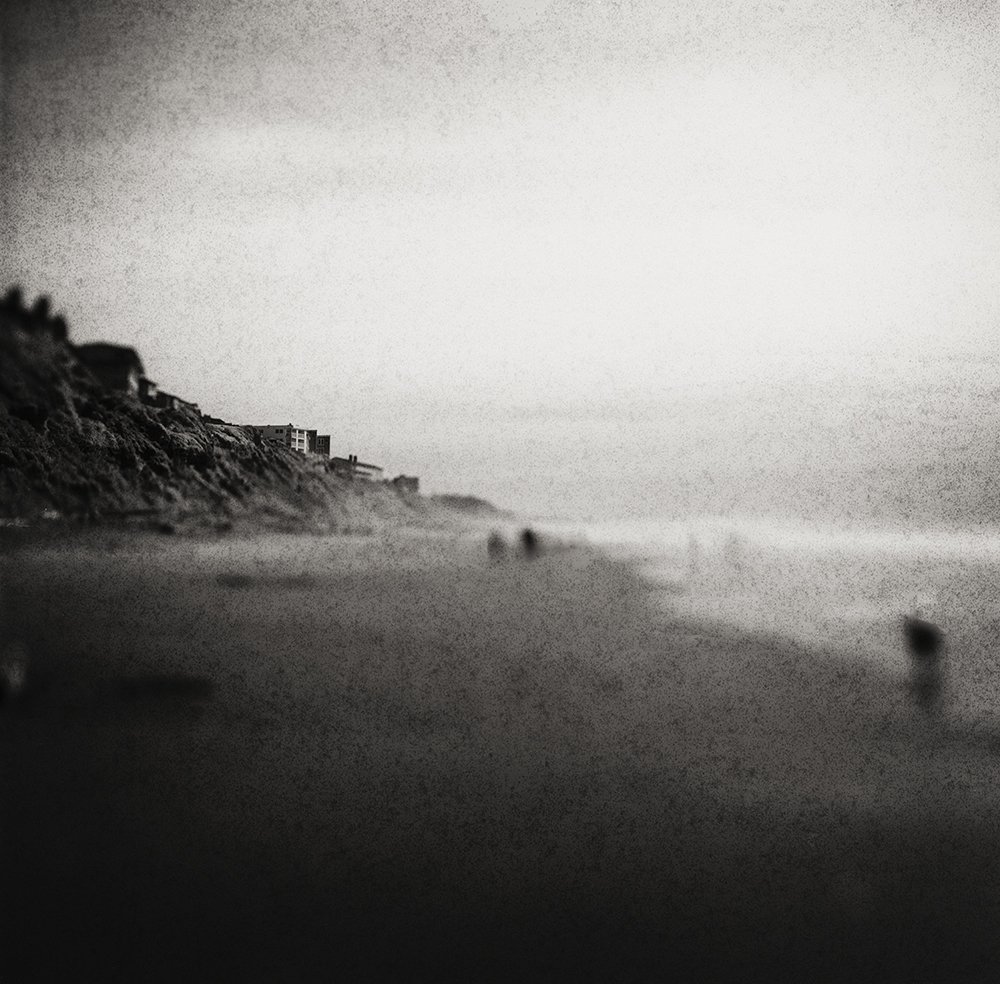
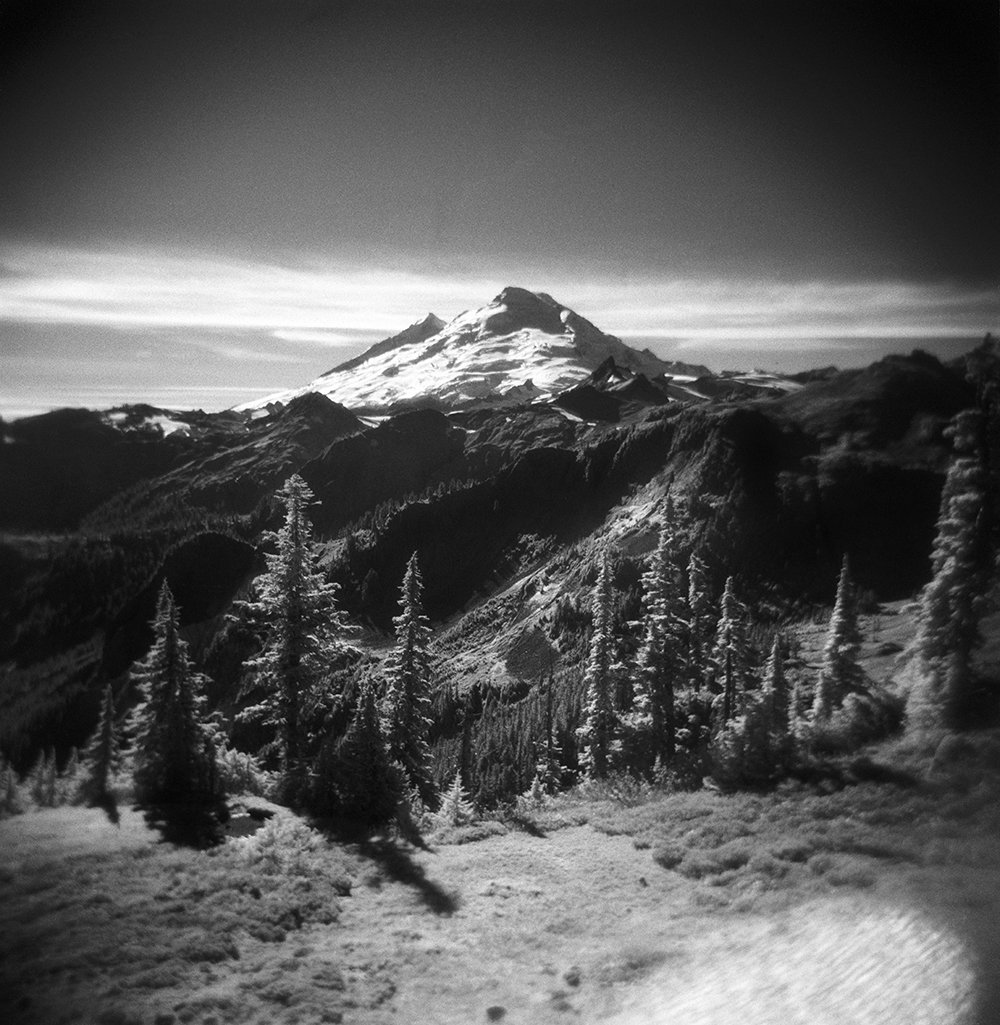
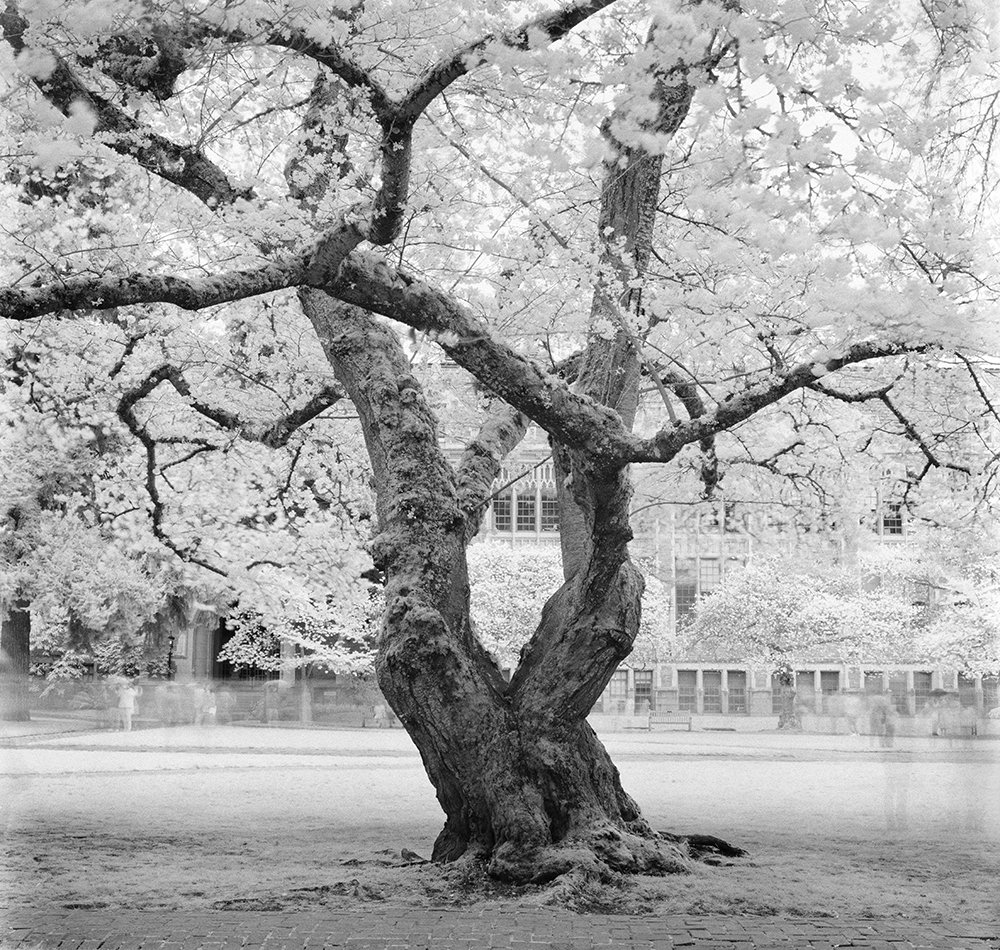
When used correctly infrared films are capable of producing distinct images with glowing vegetation. Image made with Ilford SFX 200 and an R72 filter.
The biggest trick to using infrared film is proper use of filters. You can use an infrared film without filters, but generally it produces images lacking in much of an infrared look. This is because infrared film is as sensitive, if not more so, to the visible spectrum as it is to the infrared spectrum (reference the spectral sensitivity chart for Rollei Infrared above to see this). This means if you shoot an infrared film without a filter to block visible exposure, that visible exposure overrides any exposure you are getting from infrared light. The way to solve this is with special filters that block visible light, but allow IR light to pass through to the film.
There are two basic types of filters that get used with IR film. The first is the standard red filter. A red filter is exactly what it sounds like: a red filter. These filters block the blue, green and some parts of the yellow portions of the spectrum while still allowing red light through. It means that you can see through these filters, focus through them and meter through them but at the same time you are still allowing some visible light to expose on the film and thus not getting the strongest, truest IR exposure. A red filter is quite popular because it is easier to use for the abovementioned reasons. They also have a modest filter factor - the amount of extra exposure needed to compensate for the loss of light - of about 2.5 stops. They are less expensive than IR filters. And they can be used with standard black & white films for contrast control and tonal separation. The typical red filter is the Red 25 but you will also come across a Red 29 which is just an ever so slightly darker version of the Red 25. In regard to IR photography, a Red 25 and Red 29 produce close to the same effect. An IR film used with a red filter will produce a mild IR look. Blue skies will render a deep black. Skin tones will significantly lighten and show some glow. Similarly highlighted subjects can also glow. But you will likely not get the full snowy vegetation look that comes with full IR exposure. This is where an R72 filter comes.
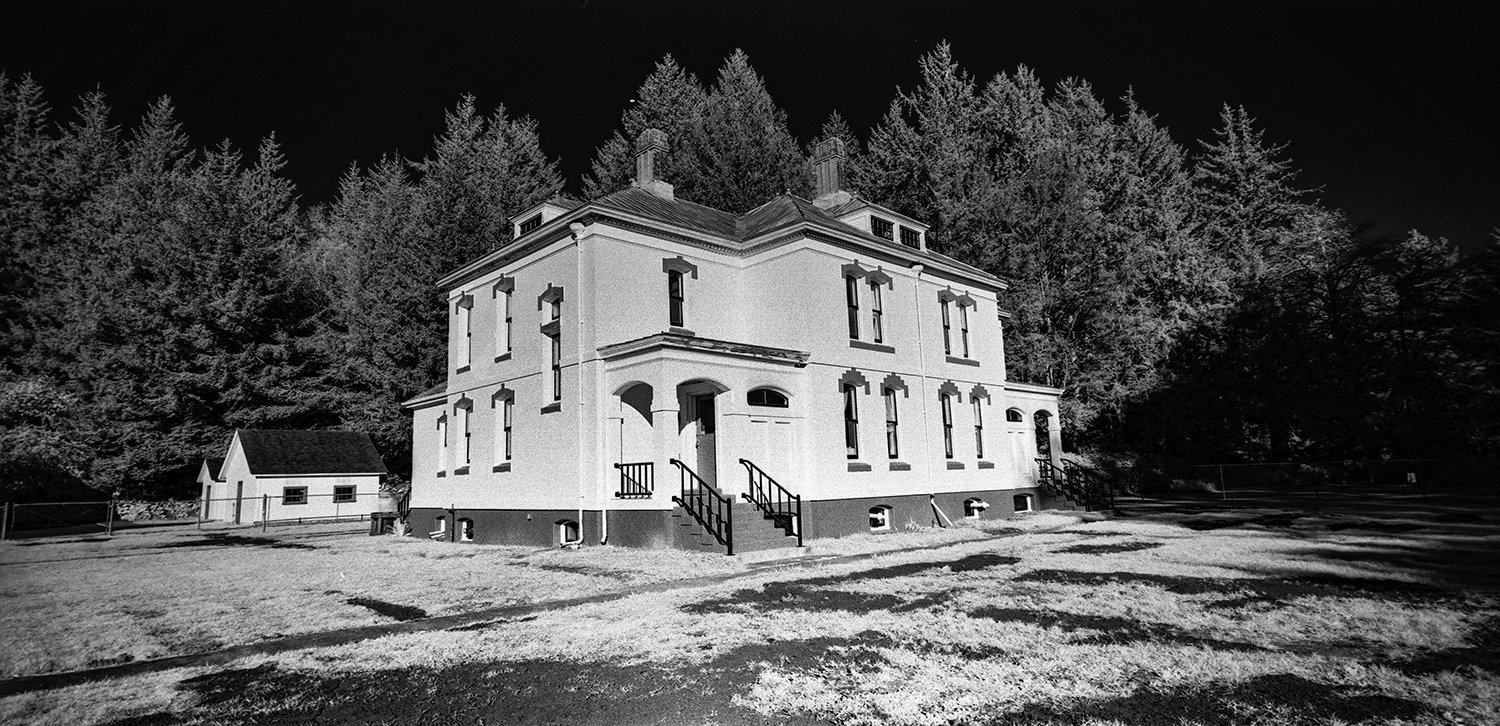
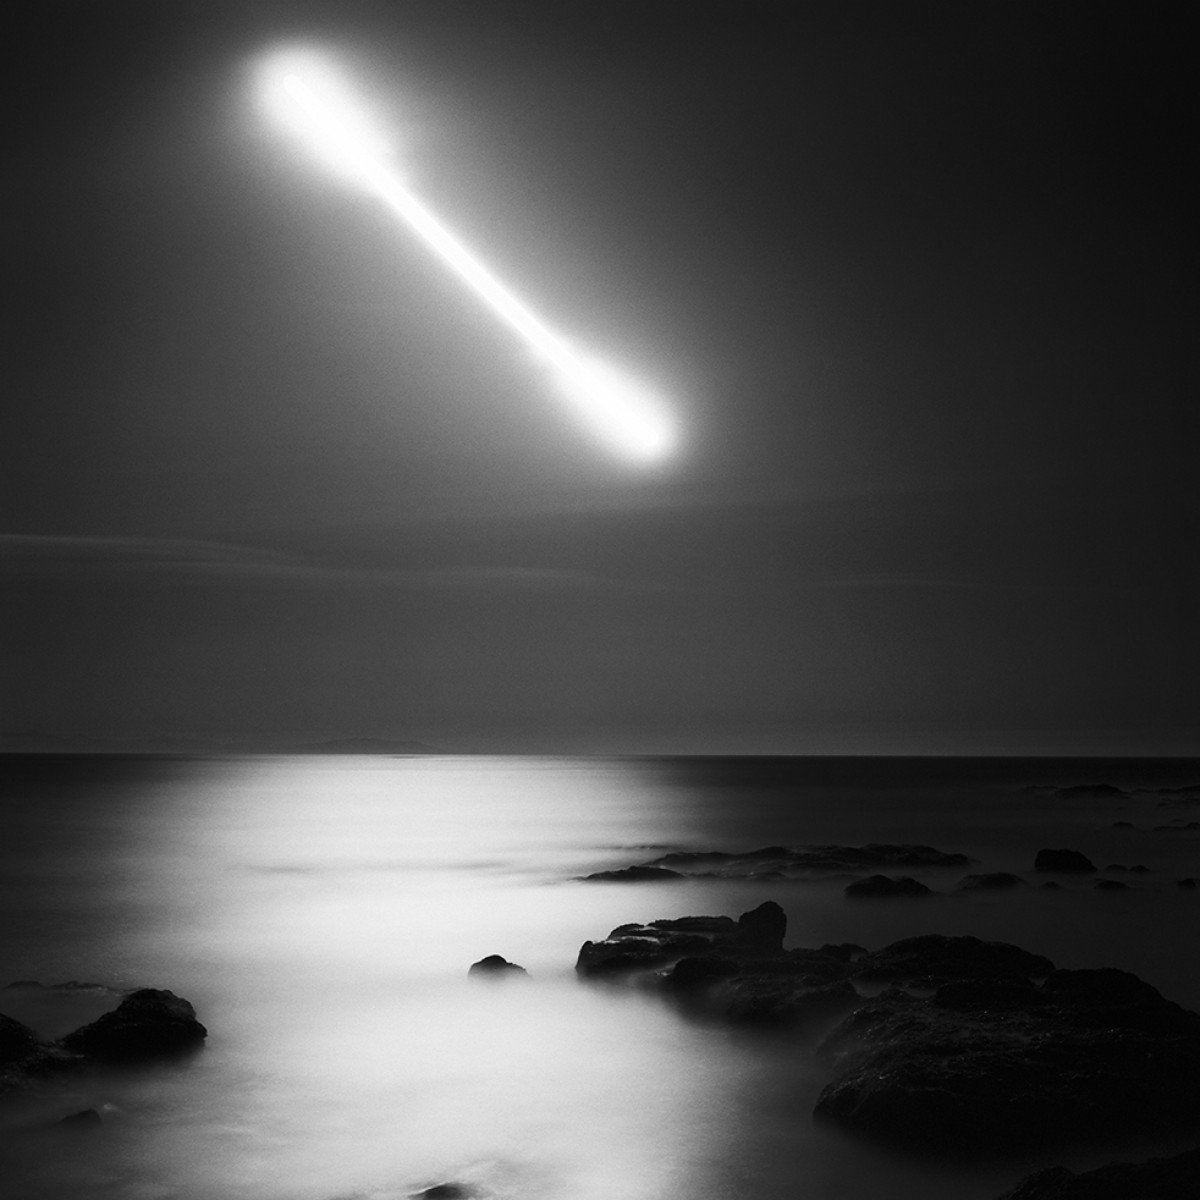
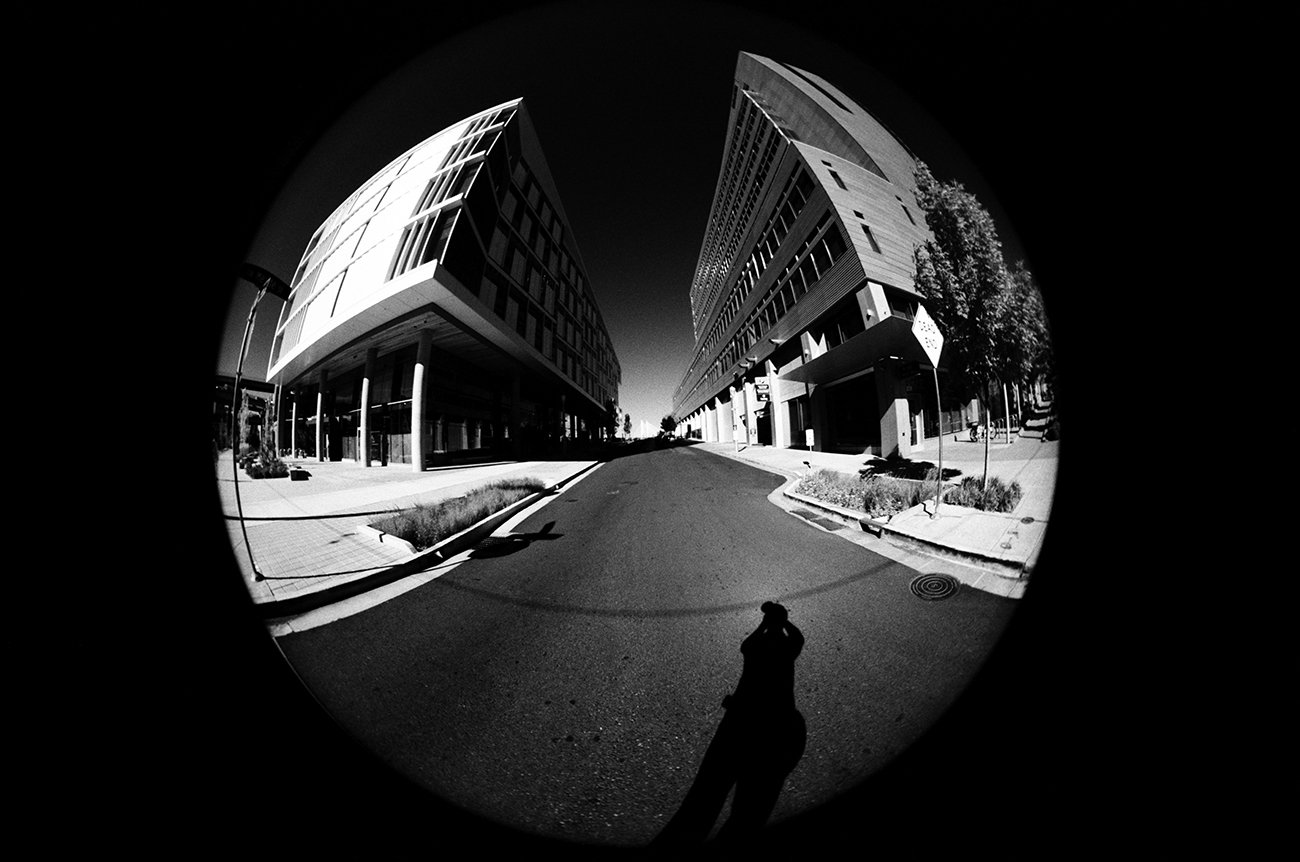
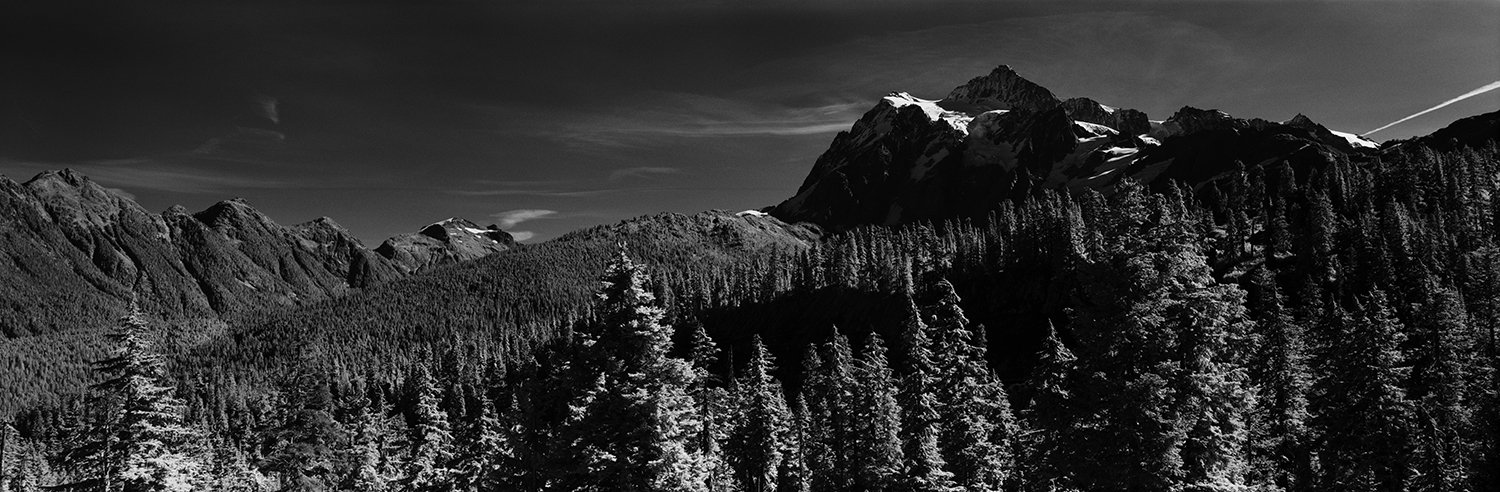
The R72 filter is just one of several Infrared filters available in varying strengths. These filters are super deep red filters that essentially block all visible light and only allow IR light through. They are near impossible to see through, so they are trickier to use since you will not be able to compose or focus through them. Likewise they can make metering tricky since many light meters also cannot see through them. They have a much stronger filter factor than a red filter, usually requiring 5-6 stops of exposure compensation. But the tradeoff to this is they limit exposure almost entirely to just IR light, allowing you to get the truest IR image and the most dramatic result. This is when grass, leaves and other green vegetation turn snowy white. Light skin tones will render a snowy white as well, while eyes can turn a haunting black. Sometimes you can even pick up blood vessels under the skin of your subjects. Blue skies will definitely render a deep black creating dramatic landscapes and cityscapes.
It is important to note that IR filters range in strength with a clue usually embedded in their name. For example, the R72 filter gets its name from the fact that it cuts off light before 720nm, only allowing films with sensitivity beyond 720nm to expose. You can find R75, R82 and R87 filters out there but you want to take care with the filter you pick out that it is not too strong for your film. Going back to Rollei Infrared which has a sensitivity out to about 780-800nm, an R87 filter that cuts off at 870nm would be too strong for this film and you would end up with blank exposures. This is why the R72 is the most popular of the IR filters because it cuts out almost all visible light, but it weak enough to work with any IR film.

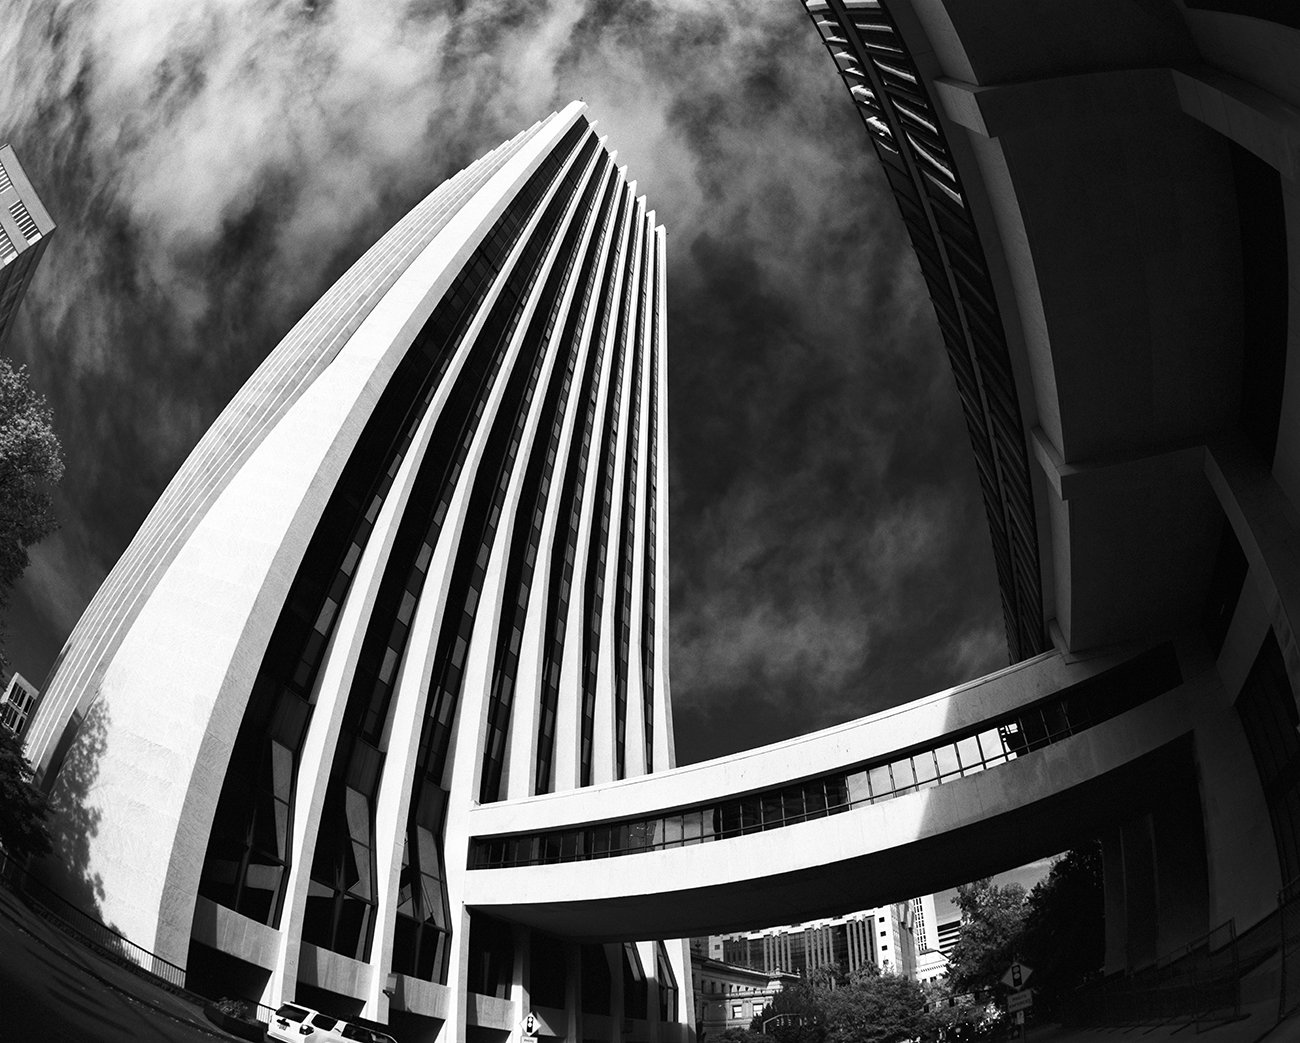
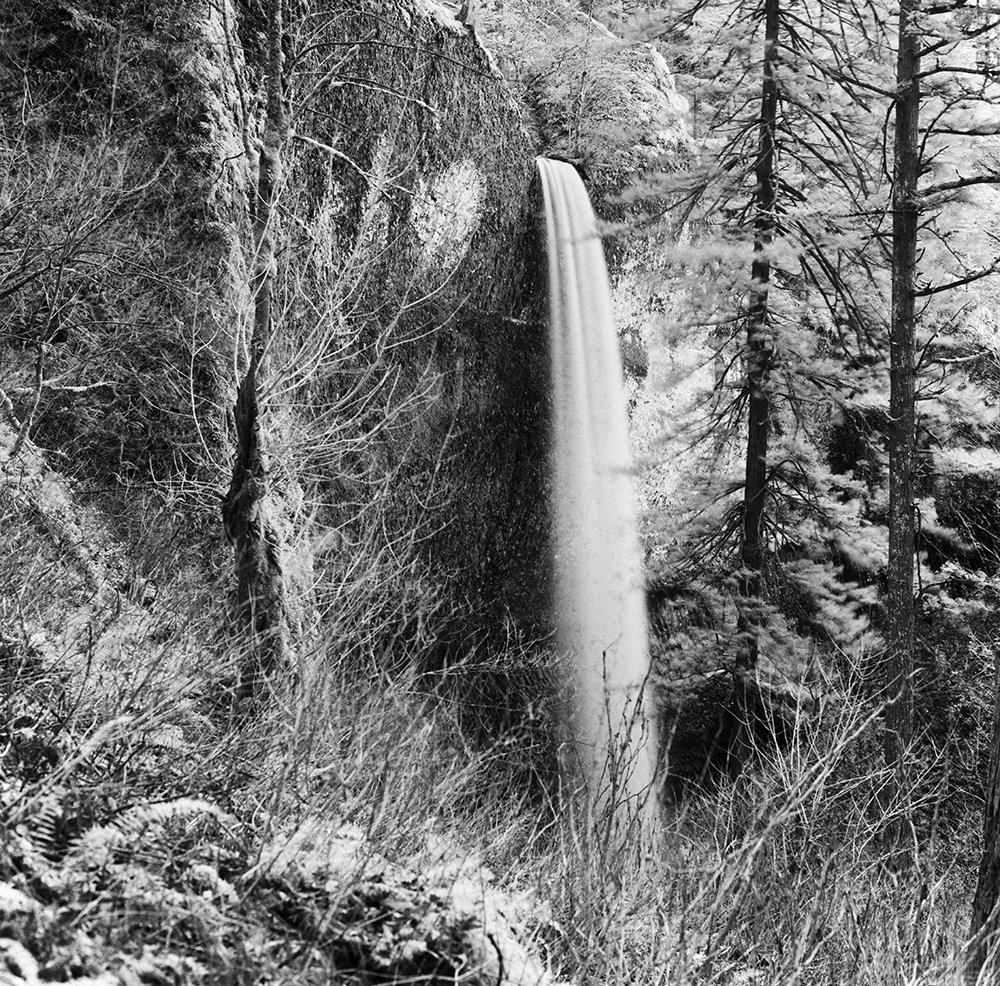
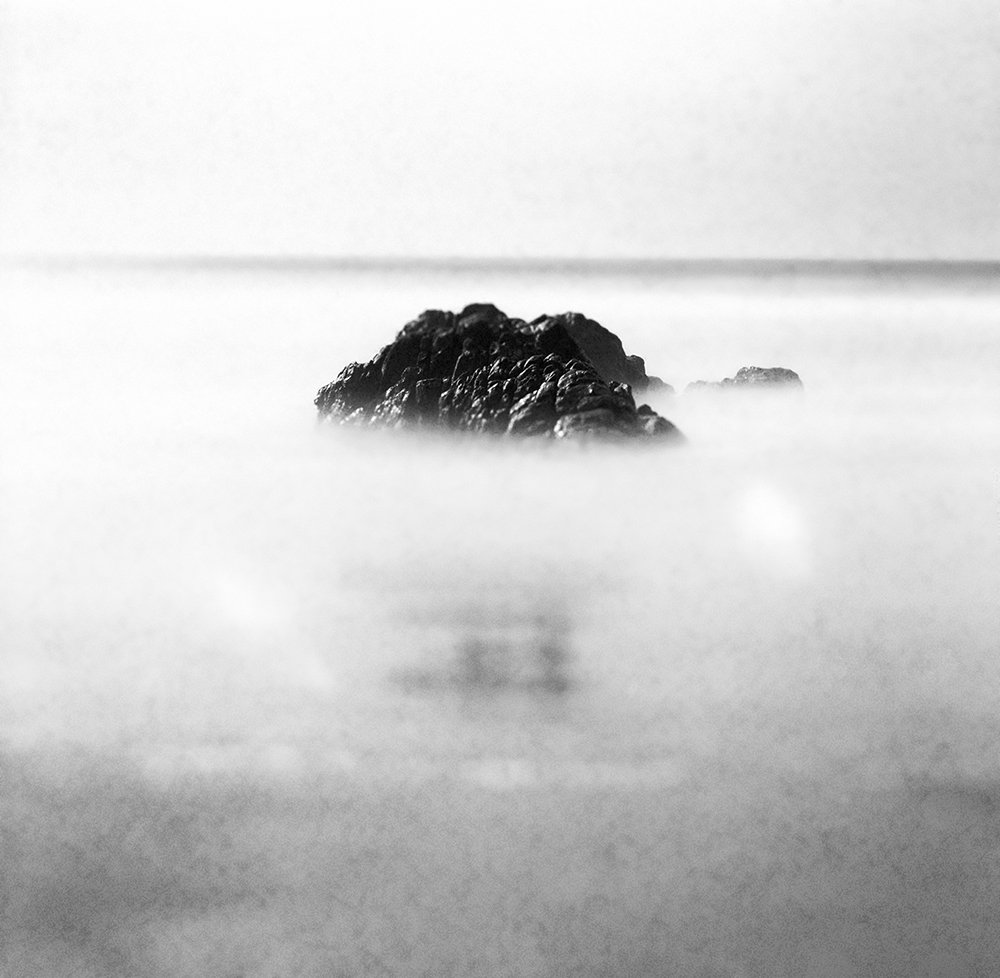
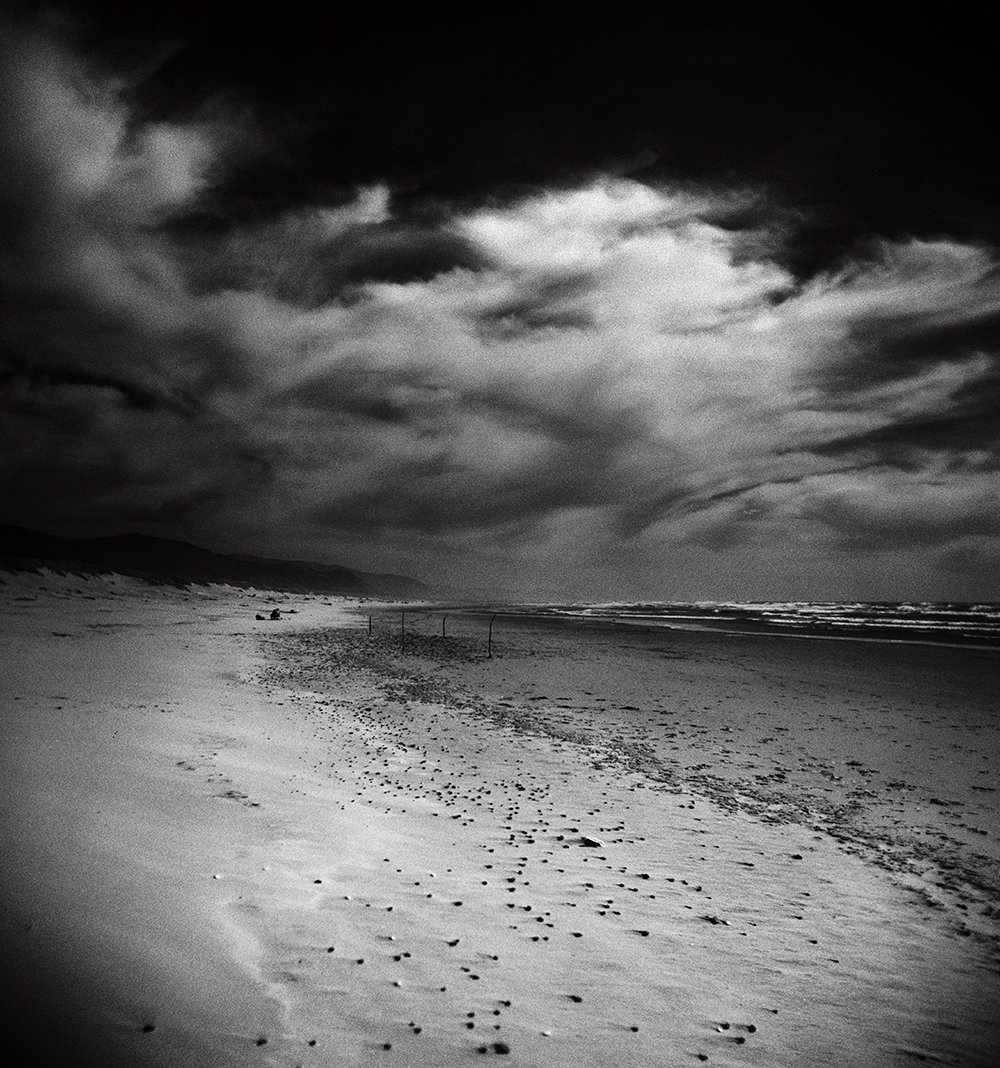
Rollei Superpan 200 exposed with no filter.

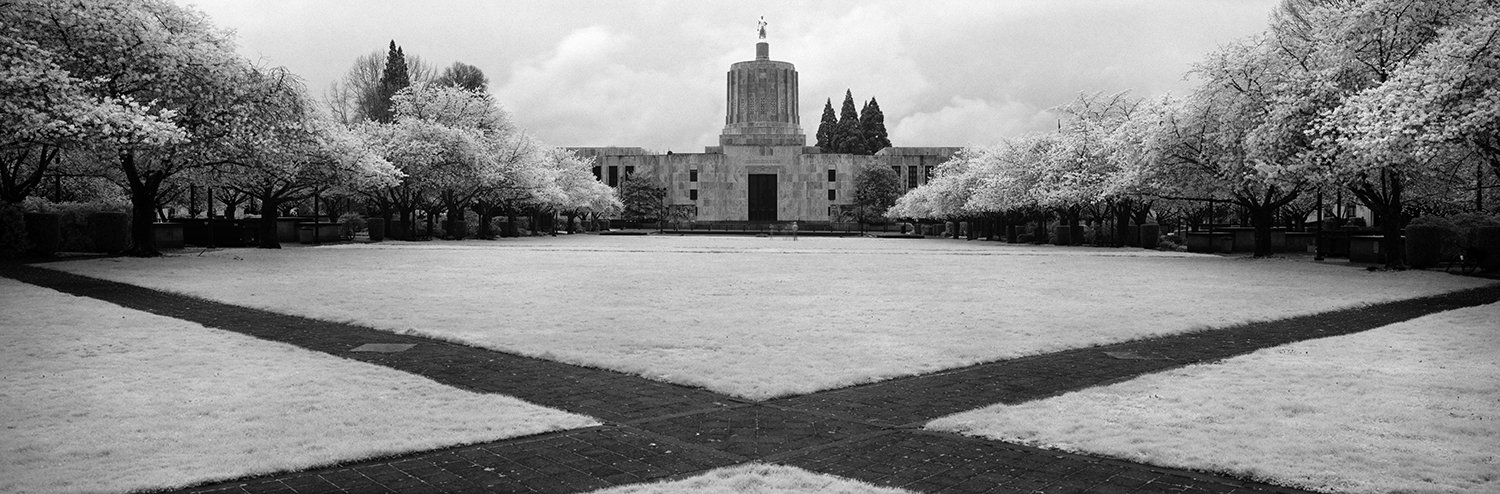
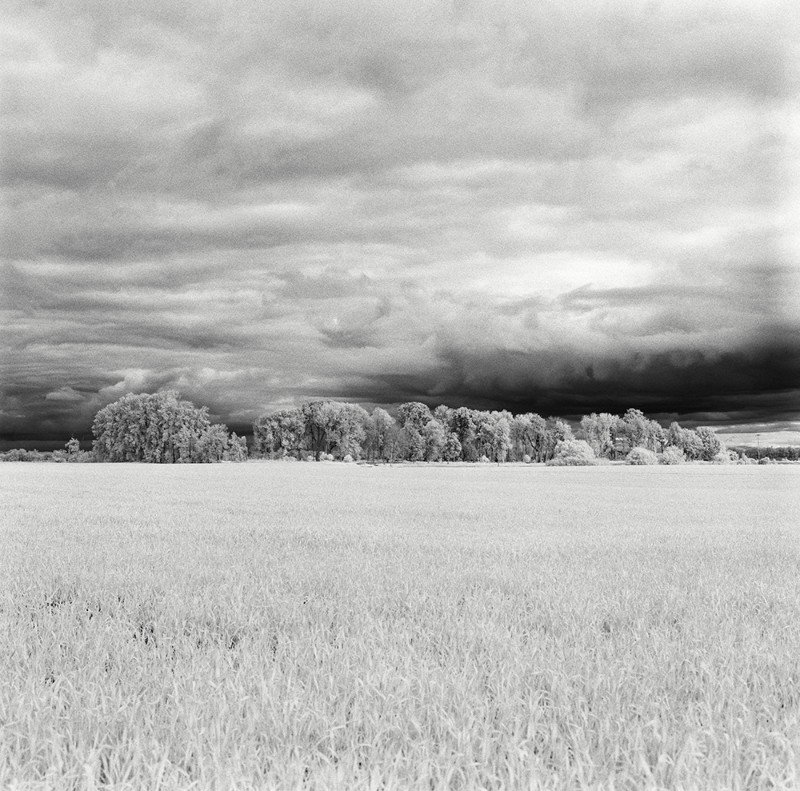
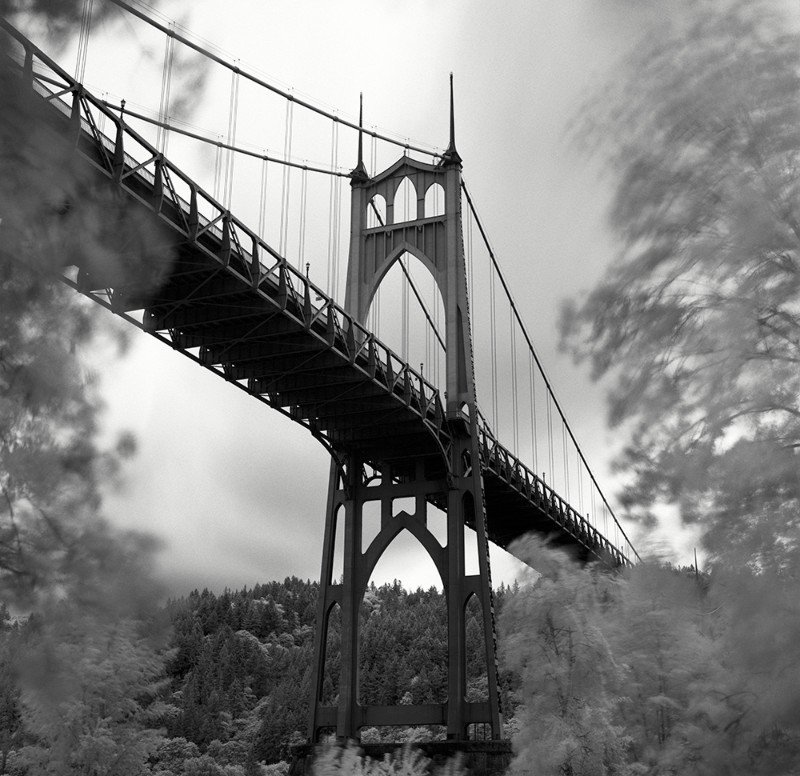
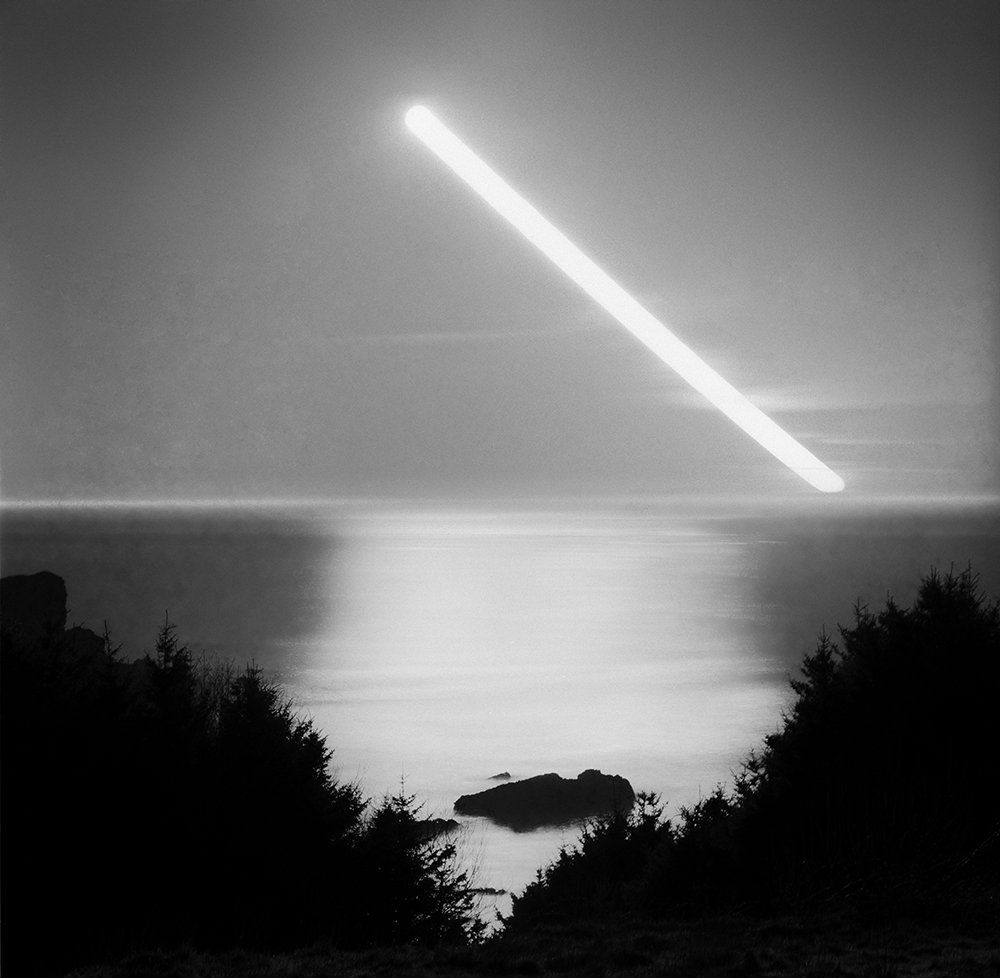
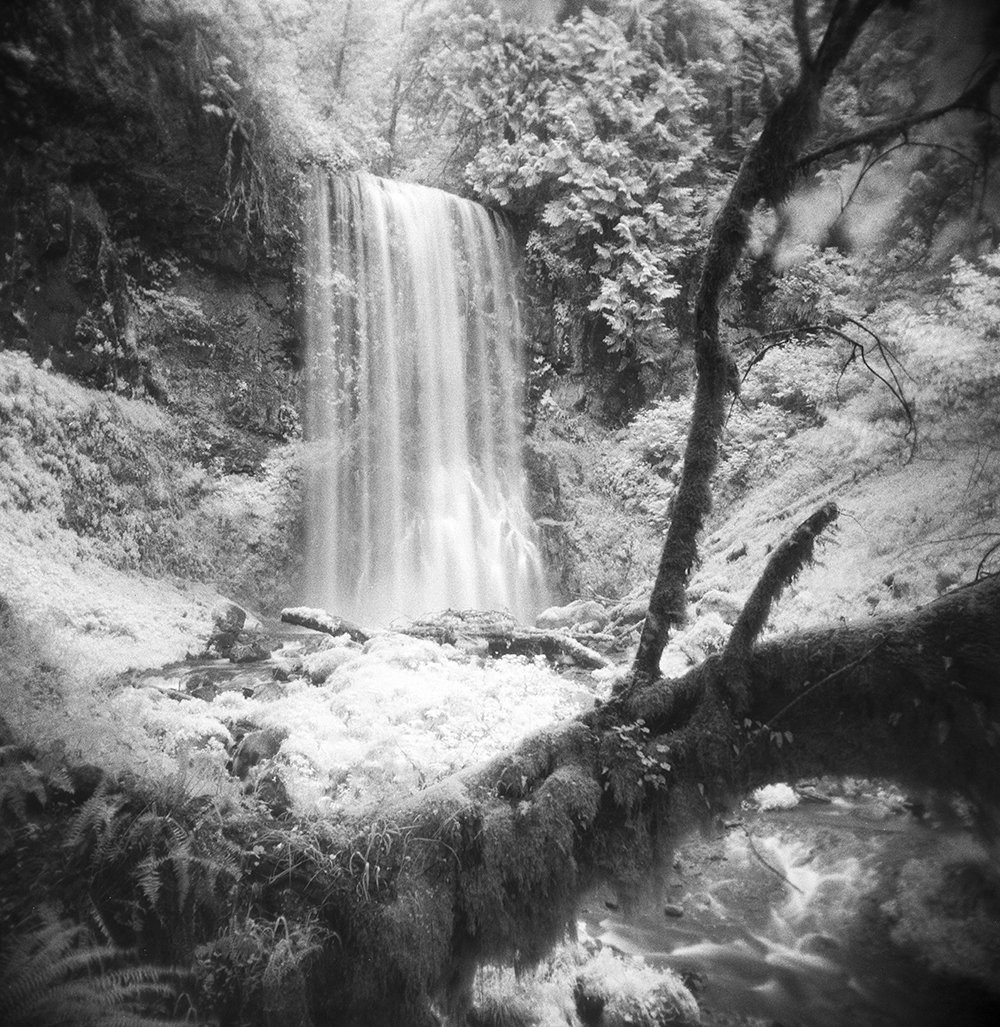
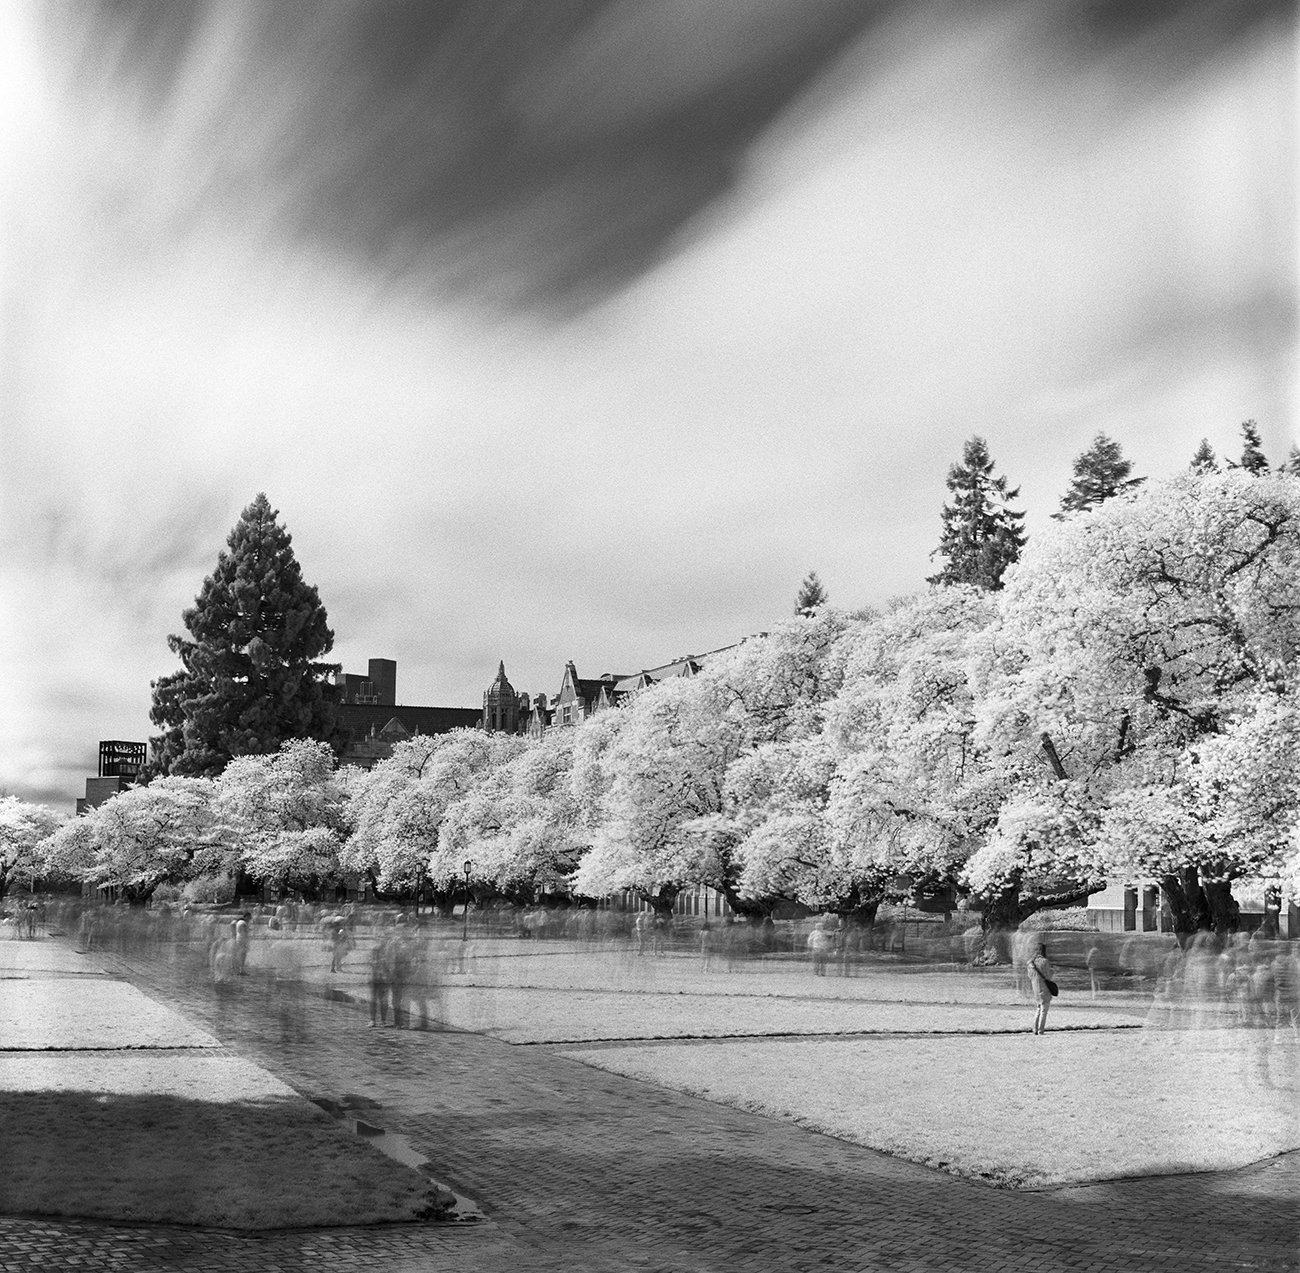
Rollei Superpan 200 exposed through an R72 filter.
As you can see from the above pair of images, filtering can make a dramatic difference with IR film. At the same time it is not absolutely necessary as you can use any infrared film unfiltered for more “normal” images.
So let’s recap filtering really fast:
To get the strongest, truest IR image you need to use an appropriate filter with your infrared film.
Red filters are easier to use and have less of a filter factor for exposure but produce less of an infrared look.
R72 filters are trickier to use and require heavy exposure compensation but produce the strongest IR image.
One last note about using R72 filters with infrared film. Since the wavelength of IR light is different from that of visible light, it is sometimes necessary to focus your lenses slightly differently to compensate for this. You will sometimes see lenses with small red marks on the focus scale. These are IR marks and you are supposed to line up your desired focus distance with these marks when shooting through IR filters. Effectively you have to focus slightly closer in infrared than you do with visible light. This is not necessary if you are using a red filter since you still get enough visible light to insure a good focus. Personally, I don’t adjust my focus when shooting through R72 filters either but I also will stop down my lens a couple of stops for increased depth of field. This can correct for the slight shift in focus. If you are shooting a very fast lens with very shallow depth of field and using an R72 filter you might want to keep this in mind. Do a bit of experimenting to see how accurate your focusing is and adjust if necessary.
So the next step is to look at the infrared-capable films available today (as of 2023) and some of their characteristics. We’ll give you a quick summary of each film, a link to our full length Film Friday review on that film and a link to that film’s datasheet!
Rollei Infrared:
Rollei Infrared is probably the most popular B&W infrared film on the market today, likely in large part because it is the most obvious. This film has a speed of ISO 400 making it a very capable daytime infrared film if you don’t want to work from a tripod when using the heavy R72 filter. It has fairly fine grain for its relative speed. According to its datasheet, Rollei Infrared has sensitivity out to 780-800nm. Not terribly far into the near-infrared range but certainly far enough for some dramatic infrared images. It does not really require any special handling (you should load in subdued light but total darkness is not necessary) and it has a lot of published development data. Overall, this is a solid choice for some infrared photography. For more info on Rollei Infrared, check out our Film Friday review of the film. Buy a roll of Rollei Infrared.
Rollei Retro 400S:
Retro 400S for pretty much all intents and purposes performs near identically to Rollei Infrared. A quick glance at its data sheet may suggest it is a more sensitive infrared film, with sensitivity out to about 820nm but closer inspection reveals 400S to have more or less the same spectral sensitivity as Rollei Infrared (Rollei Infrared’s data sheet truncates the spectral sensitivity chart where 400S does not). This film is also essentially Agfa Aviphot 400S. So everything we said above about Rollei Infrared applies to Retro 400S as well. It is highly capable and pretty versatile. If you cannot find Rollei Infrared, this makes a near perfect replacement. And just like Rollei Infrared, we have a full length Film Friday Review of Retro 400S as well. Buy a roll of Rollei Retro 400S.
Rollei Superpan 200:
Rollei Superpan 200 is the 200 ISO member of the same family of films as Rollei Retro 400S. It also has very similar IR characteristics according to its data sheet. Being a slightly slower speed film, Superpan 200 benefits from being slightly finer grained. But that slightly slower speed also means that if you are not using this film on a bright day in full sun then you might have to resort to either using a tripod or stepping down to a Red 25 or 29 filter instead of the full R72 filter. However you use it, Superpan 200 is another capable choice for an IR film. Read our full length Film Friday Review to learn even more about it. Buy a roll of Rollei Superpan 200.
Rollei Retro 80S
Rollei Retro 80S is the slowest member of the same family as Superpan 200 and Retro 400S. It also has nearly the same IR sensitivity as those other two films making its only real difference its speed. As an ISO 80 film, it has the finest grain of any infrared film on the market and the best resolution. If sharpness and detail are what you are after in your IR images then Retro 80S is your film. Its slower speed will also help if you are looking to embrace longer, rather than shorter, exposures. The data sheet for Rollei Retro 80S is linked for you. Also check out our Film Friday Review for a more in depth look at this film’s specific characteristics. Buy a roll of Rollei Retro 80S.
Ilford SFX 200
SFX is distinct from the other infrared films we have listed thus far. Made by Ilford, the couple of things most worth knowing about SFX are that it is as infrared sensitive as any other IR film out there as shown by its data sheet, and that it is the grainiest of all the films. Most photographers like to pair SFX with a red filter for plenty of drama but you can also use it with a full R72 filter and get a strong IR image as well. This really is a fun film and if you like grit rather than smoothness to your images, then get a roll of SFX. As usual, a full Film Friday Review exists for your perusal. Buy a roll of Ilford SFX 200.


JCH Street Pan 400
Street Pan is another superpanchromatic ISO 400 black and white film that functions very similarly to both Rollei Infrared and Retro 400S. It is advertised mostly for its high contrast, dramatic look when shot unfiltered but can be combined with a red filter for a light IR look or with an R72 for a full infrared look. Like those other two films it benefits from fairly fine grain, good sharpness and a versatile film speed that makes hand-held daytime shooting through an IR filter possible. There is no published data sheet that we could locate but in a pinch you can use the data sheet for Rollei Retro 400S as a starting point. Buy a roll of JCH Street Pan.

We are almost to the end of our breakdown of shooting with infrared films. To wrap up we wanted to cover a couple frequently asked questions.
Does infrared film need to be loaded in complete darkness?
Not really. It is true that previous films like Kodak HIE and Aerochrome required handling in total darkness lest you would fog and ruin the entire roll. But today’s batch of infrared films covered above all support daylight loading. It is never a bad idea to move into shade or subdued lighting for loading and unloading, and to store the film in light tight containers but you can load and handle the film in subdued light.How do you get the “glow” with IR film?
The glow you sometimes see on IR film photos is called halation. It is caused by light passing through the film during exposure and reflecting/refracting back through the film causing a glow of exposure around highlights. Pretty much all modern films have an anti-halation layer in the film to prevent this. Some past IR films like Kodak HIE or Efke IR820C Aura were made without this layer. Unless this layer is removed it can be tough to produce these glowing highlights. Sometimes overexposing can trigger it, or washing the anti-halation layer off of your film prior to exposure. This latter method though is a bit involved and probably not suitable for casual shooters.Is there a color infrared film?
Sadly not really anymore. You can sometimes find rolls of Kodak EIR or Aerochrome online but these typically have extremely high prices and have gotten pretty rare. We came across an Astrum color infrared a few years back but have not seen it again since. Currently nobody manufactures fresh color infrared film but there is a way to simulate a color IR look via B&W infrared film. Read on for more on that.How do I develop infrared film?
Exactly the same way you develop standard black and white film. You simply need to find the appropriate developing time that matches your preferred film developer and film you are using. Simple as that.Does infrared film only work on sunny days?
Any day involves infrared light, be it sunny, overcast or rainy. You can even do infrared photography at night since a lot of artificial light sources emit infrared light. In short you can shoot infrared film anytime and pretty much anywhere though your mileage will vary depending on the situation and exposure techniques that work in one type of lighting might require adjustment for another. For example, your R72 might have a filter factor of 5 stops on sunny days but perhaps it needs 6 or 7 stops on overcast days. You will have to experiment to determine the best means of exposing. The amount of infrared light also varies depending on time of day and altitude as well. Things to keep in mind.Can infrared film see heat?
No, it is not sensitive enough for thermal imaging. Thermal imaging cameras are typically sensitive to wavelengths up to 14,000nm while infrared film typically only sees up to about 800-850nm.
Ok, so as a reward for getting this far we have one last interesting tidbit to throw your way. There is a technique referred to as “trichrome” photography. It actually has been around for over 100 years and predates the invention of color film. Trichrome photography is a means of filtering black and white exposures so that they reproduce a full color image later on. That’s right, color images from b&w film. To summarize the technique it requires making three separate exposures (on three separate frames of film): one filtered through a red filter, one through a green filter and one through a blue filter. Each of these exposures captures different tonal information in a way that if filtered again after the film is developed the combined images produce a color photo. You can do an internet search for Sergey Prokudin-Gorsky, who was producing color trichrome images as early as the late 19th century.
We are not going to delve into the “how to” of trichrome photography - we’ll save that for you to research on your own, but suffice it to say that the technique can be adapted to b&w infrared films to produce color infrared images. Simply create your images using an R72 (in place of red), green and blue filters and the resulting three exposures can be combined to produce a very Aerochromesque look!
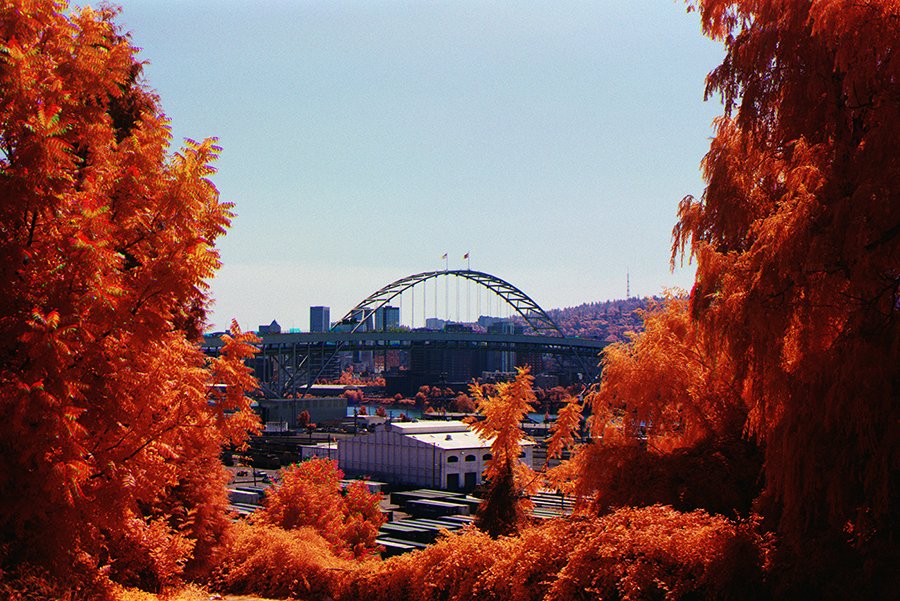
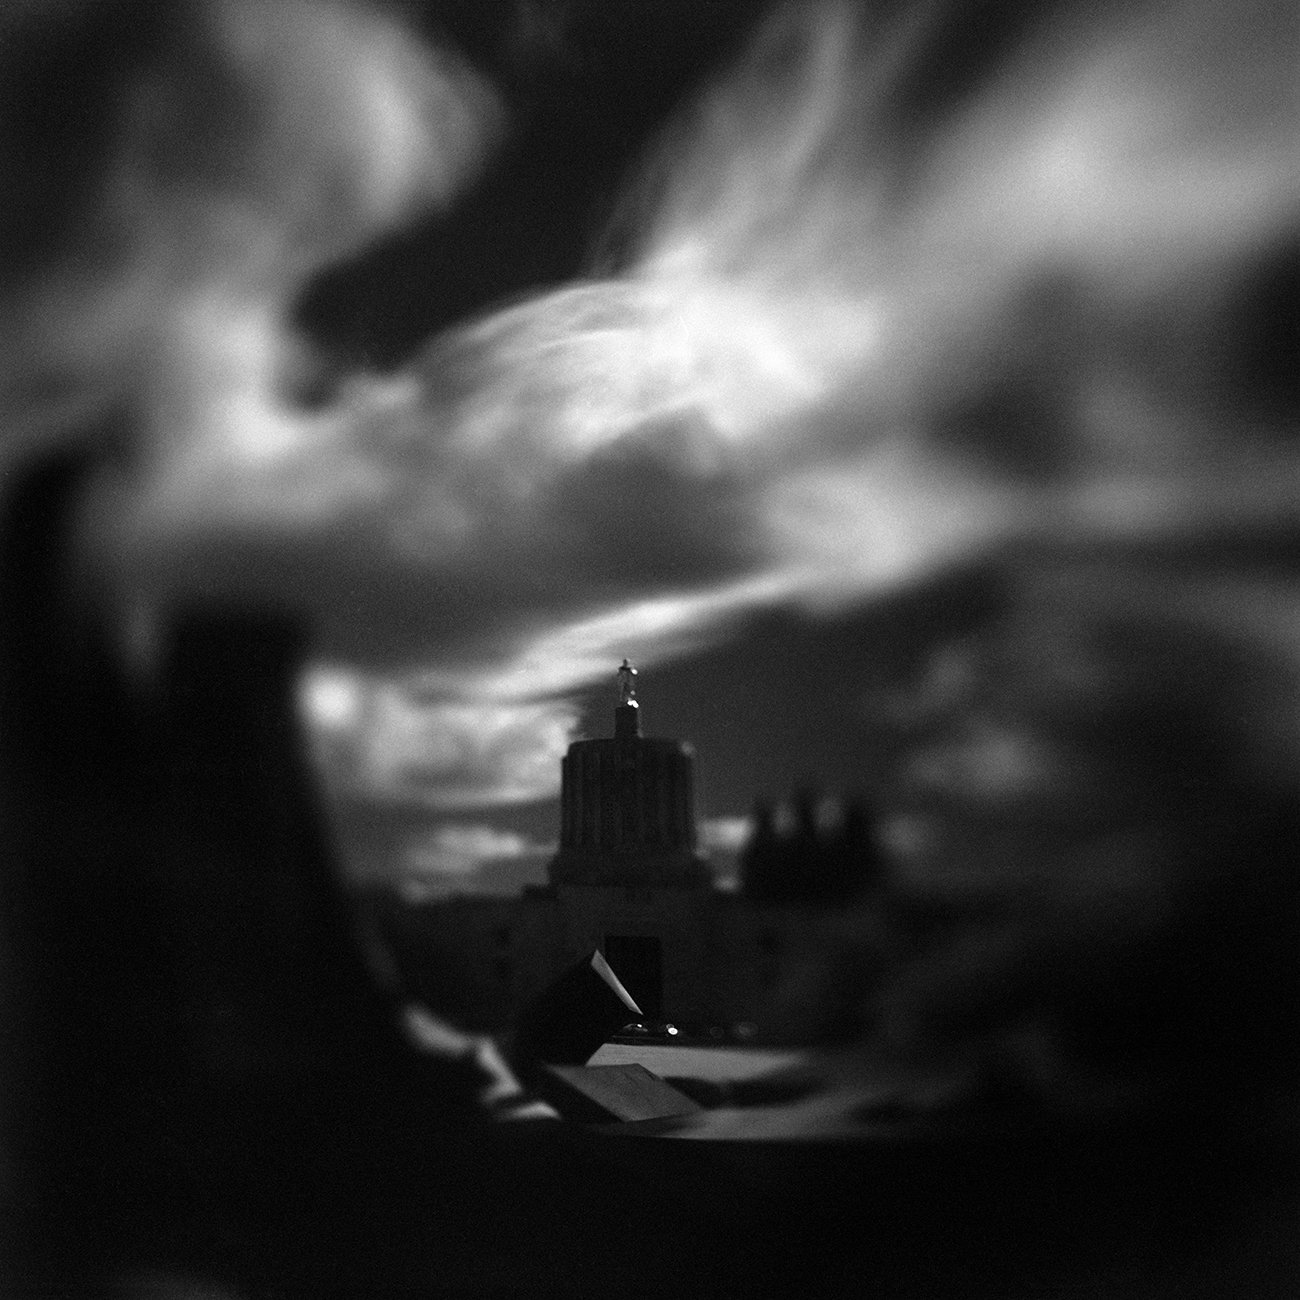
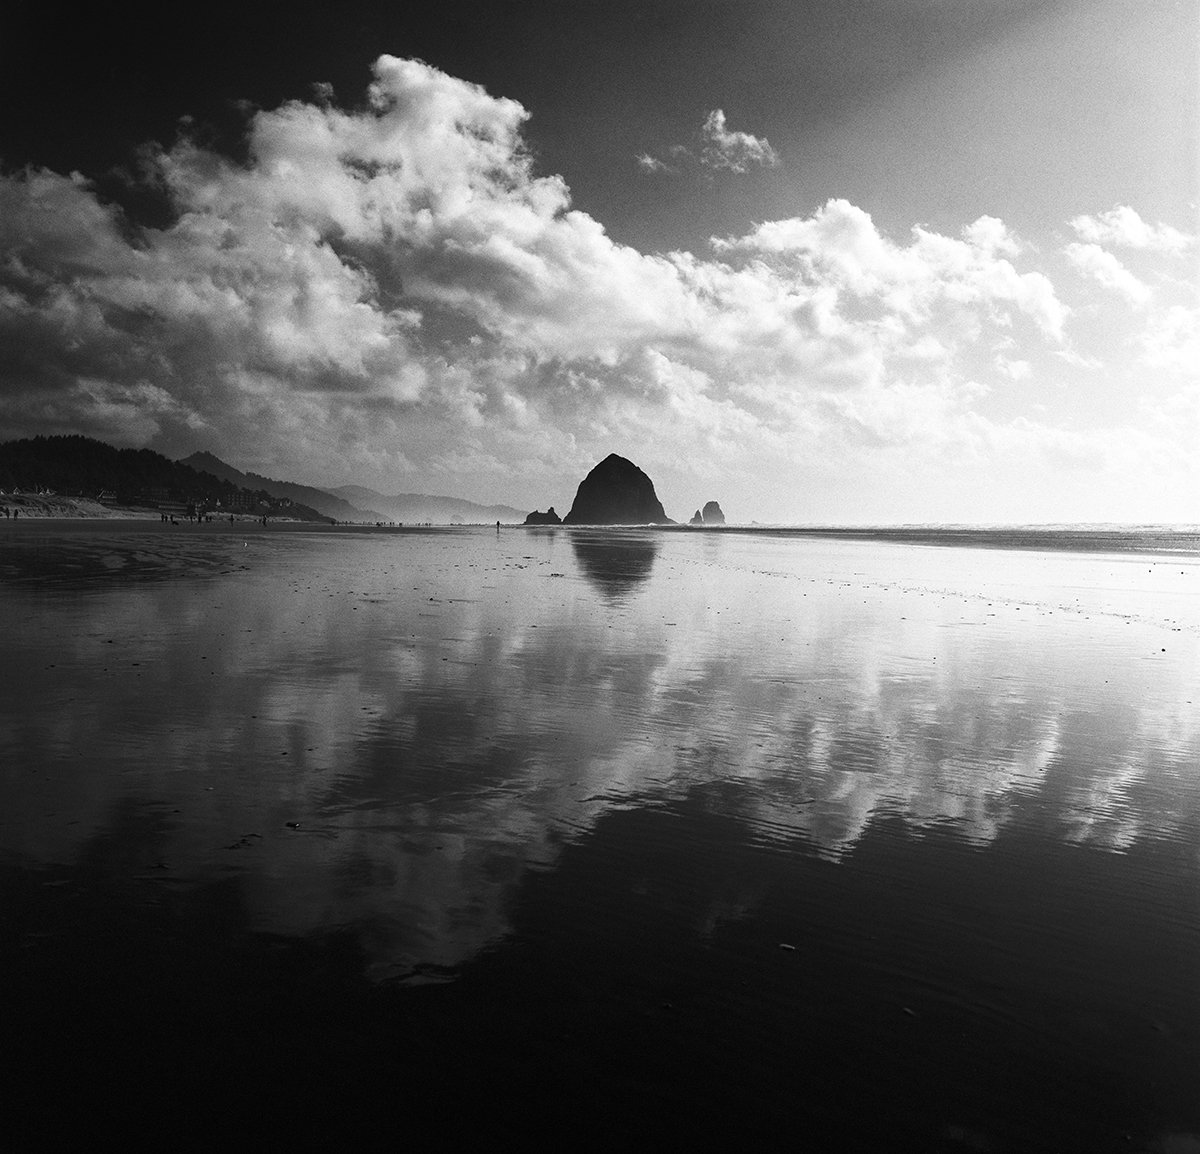
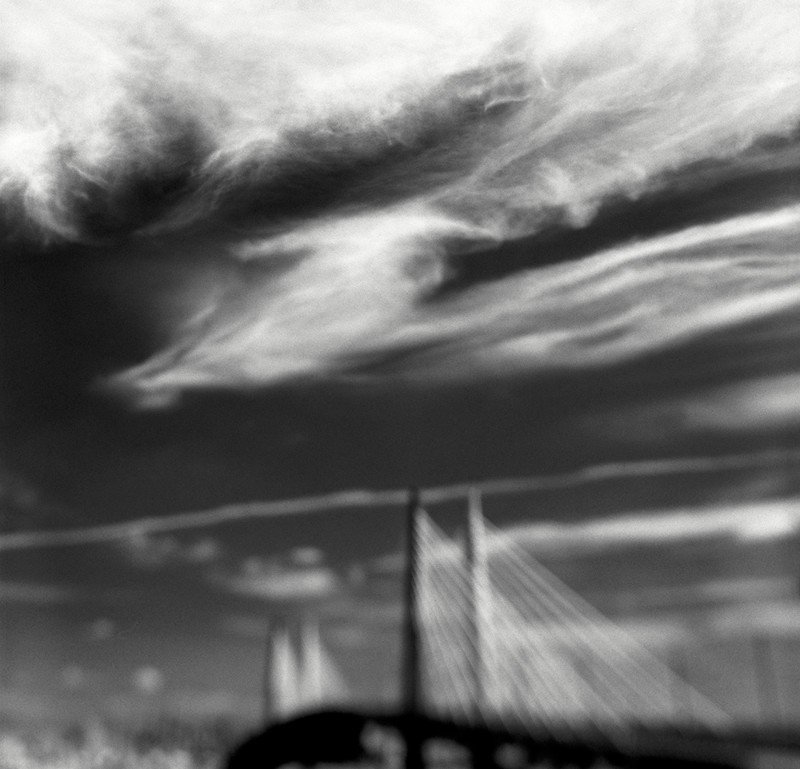
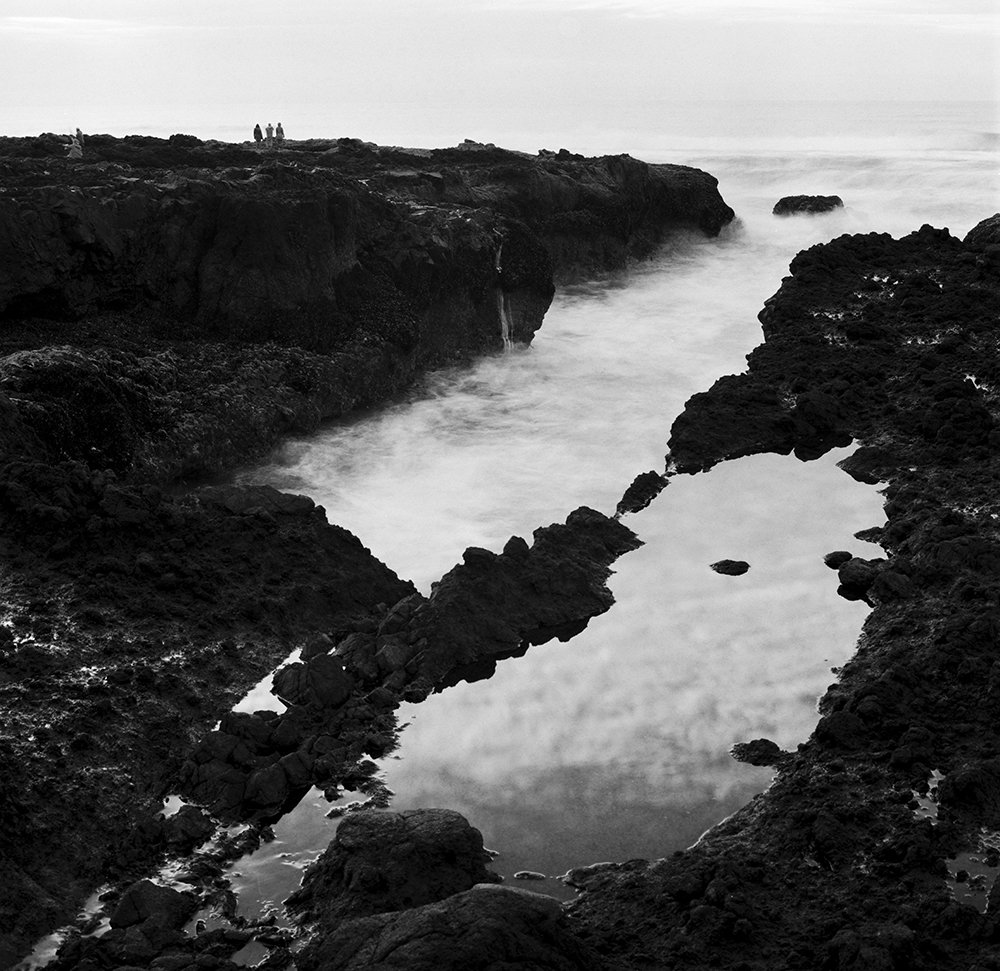
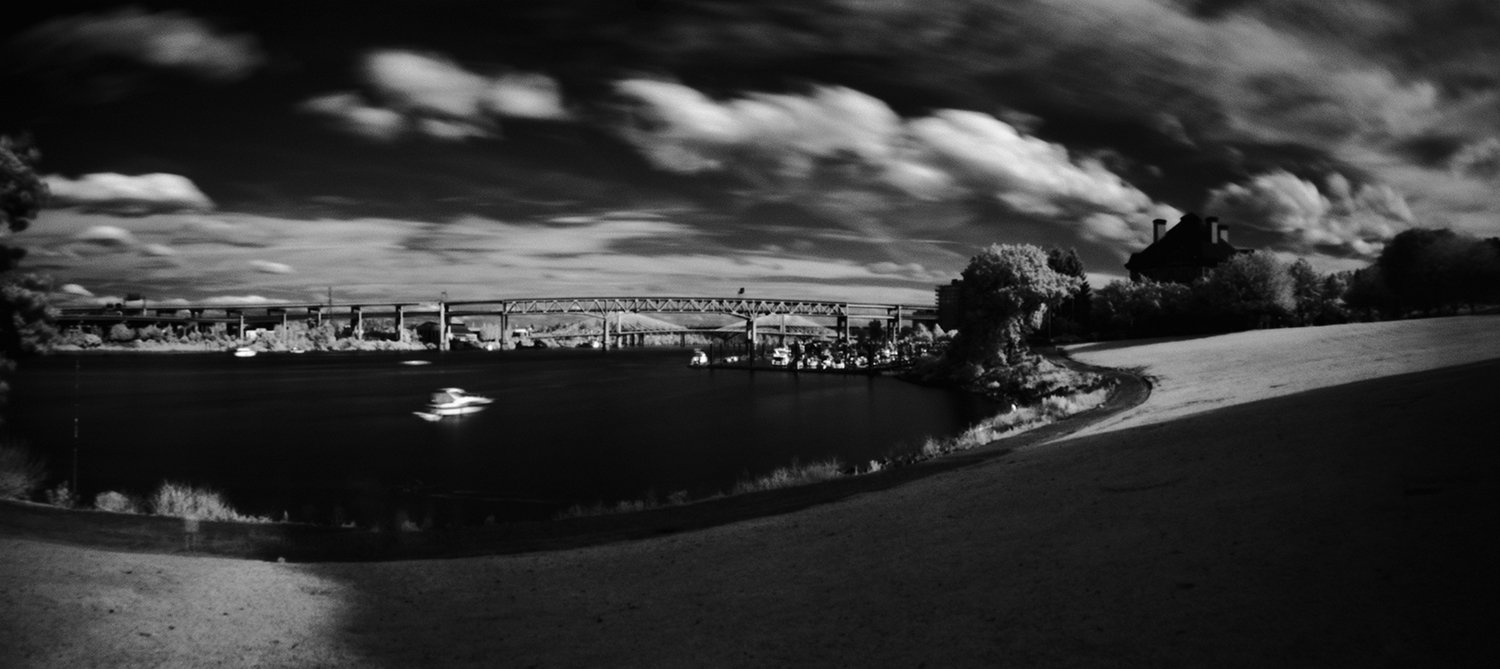
This image was shot on Rollei Infrared as a trichrome (three separate exposures on three separate frames of film) using an R72, a green and a blue filter.
That about does it for this in-depth look at infrared film photography folks. We have several infrared photographers on our staff so if you have any questions, want some advice or are looking for some film or filters to do infrared photography then don’t hesitate to get in touch with us!