
Typewriter Troubleshooting
Written by Katt Janson Merilo
Using a typewriter is a rewarding and fun writing experience, but your typing journey can be unexpectedly waylaid by some common quirks for these machines. We’d like to help you troubleshoot some of the more common typewriting issues you may come across. Whether you did a lot of typing a long time ago and are now a bit out of practice, or you’ve got your hands on the first typewriter you’ve ever personally encountered, these short tips will likely solve many of the issues you may encounter on a manual typer. (But If these fast fixes don’t work, though, stop there! The problem is likely more in depth than what you should attempt to fix on your own.)
To further illustrate some of these tricks, we’ll use these three machines as examples:
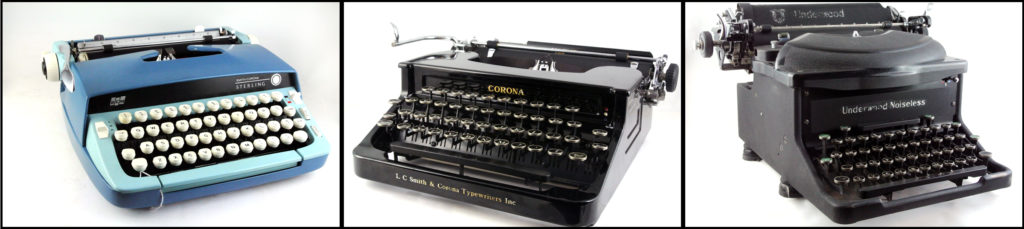
From left to right: A Smith Corona Sterling, Smith Corona Silent Four Bank, and Underwood Noiseless Upright desktop
“My carriage won’t move!”
Chances are the carriage is locked down to allow for safe transport. If your typewriter is fresh off the Blue Moon Camera shelf, we usually do this before sending you on your way with your new companion. Nine times out of ten the solution for this is as easy as finding the carriage release on your machine (which, admittedly, can be a bit tricky). If you’re unsure where the release is, try finding the machine’s manual in an online search. For example, on the Smith Corona Sterling, the carriage lock is the silver switch pictured below. For this more modern machine, the carriage is released by gently guiding the carriage all the way to the right and then all the way to the left.
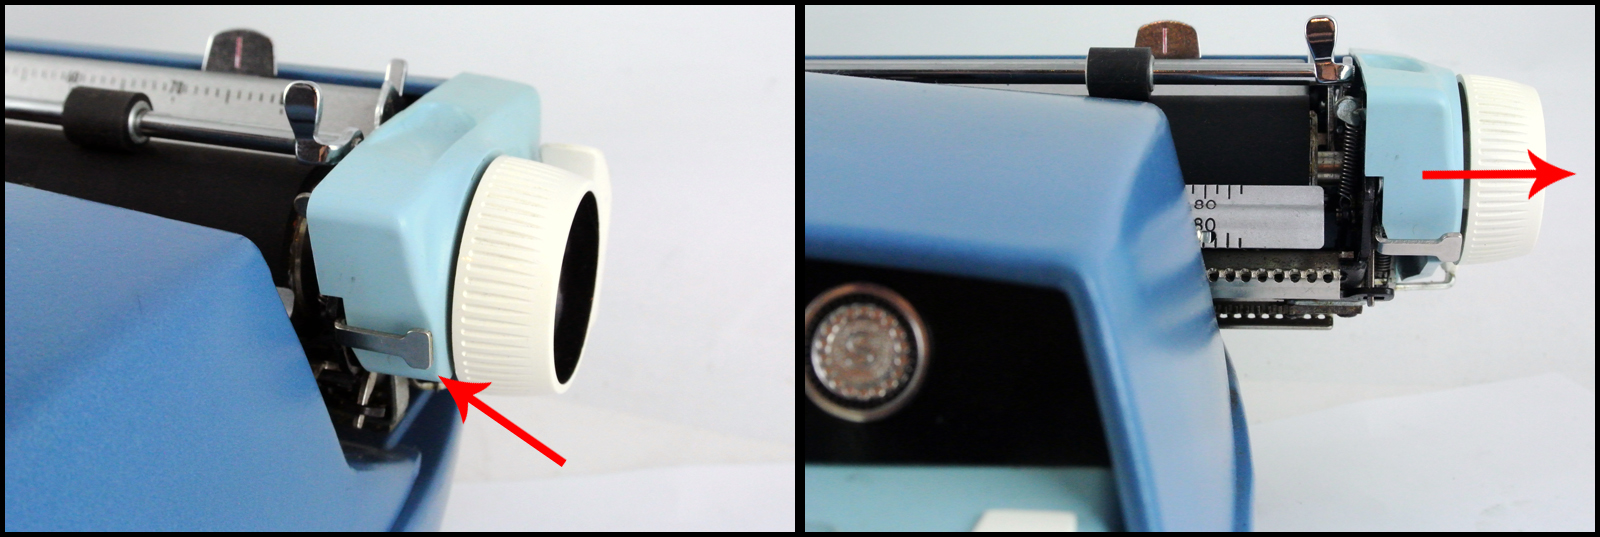
Left: Carriage lock switch on the Smith Corona Sterling; Right: Slide carriage to right then left to unlock
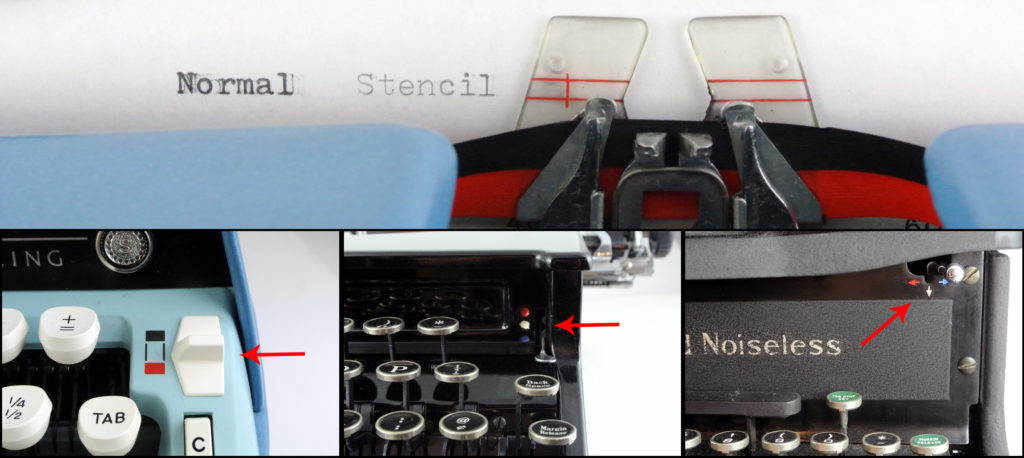
“The type is way too light – what gives?”
This could be one of two things. If you can’t remember the last time you changed the typewriter ribbon, it’s likely time for a replacement. Ribbons lose their ink over time with use or dry out when left sitting for too long. If you need a new ribbon, you can come in the shop or stop by the Automat – the ones we have in stock fit *most* manual machines. If you’re unsure or nervous about whether or not this is the right size ribbon for your machine, feel free to contact us.
If you know that your ribbon is relatively fresh, there’s another factor that could be affecting your typing clarity: many machines come with a stencil mode, which could be making your typer produce outlines of letters rather than its typical bold typeface. Like the carriage release, the switch to turn this off could be pretty much anywhere on your machine. Track down a manual or do a thorough internet search for info on your particular make and model of machine.
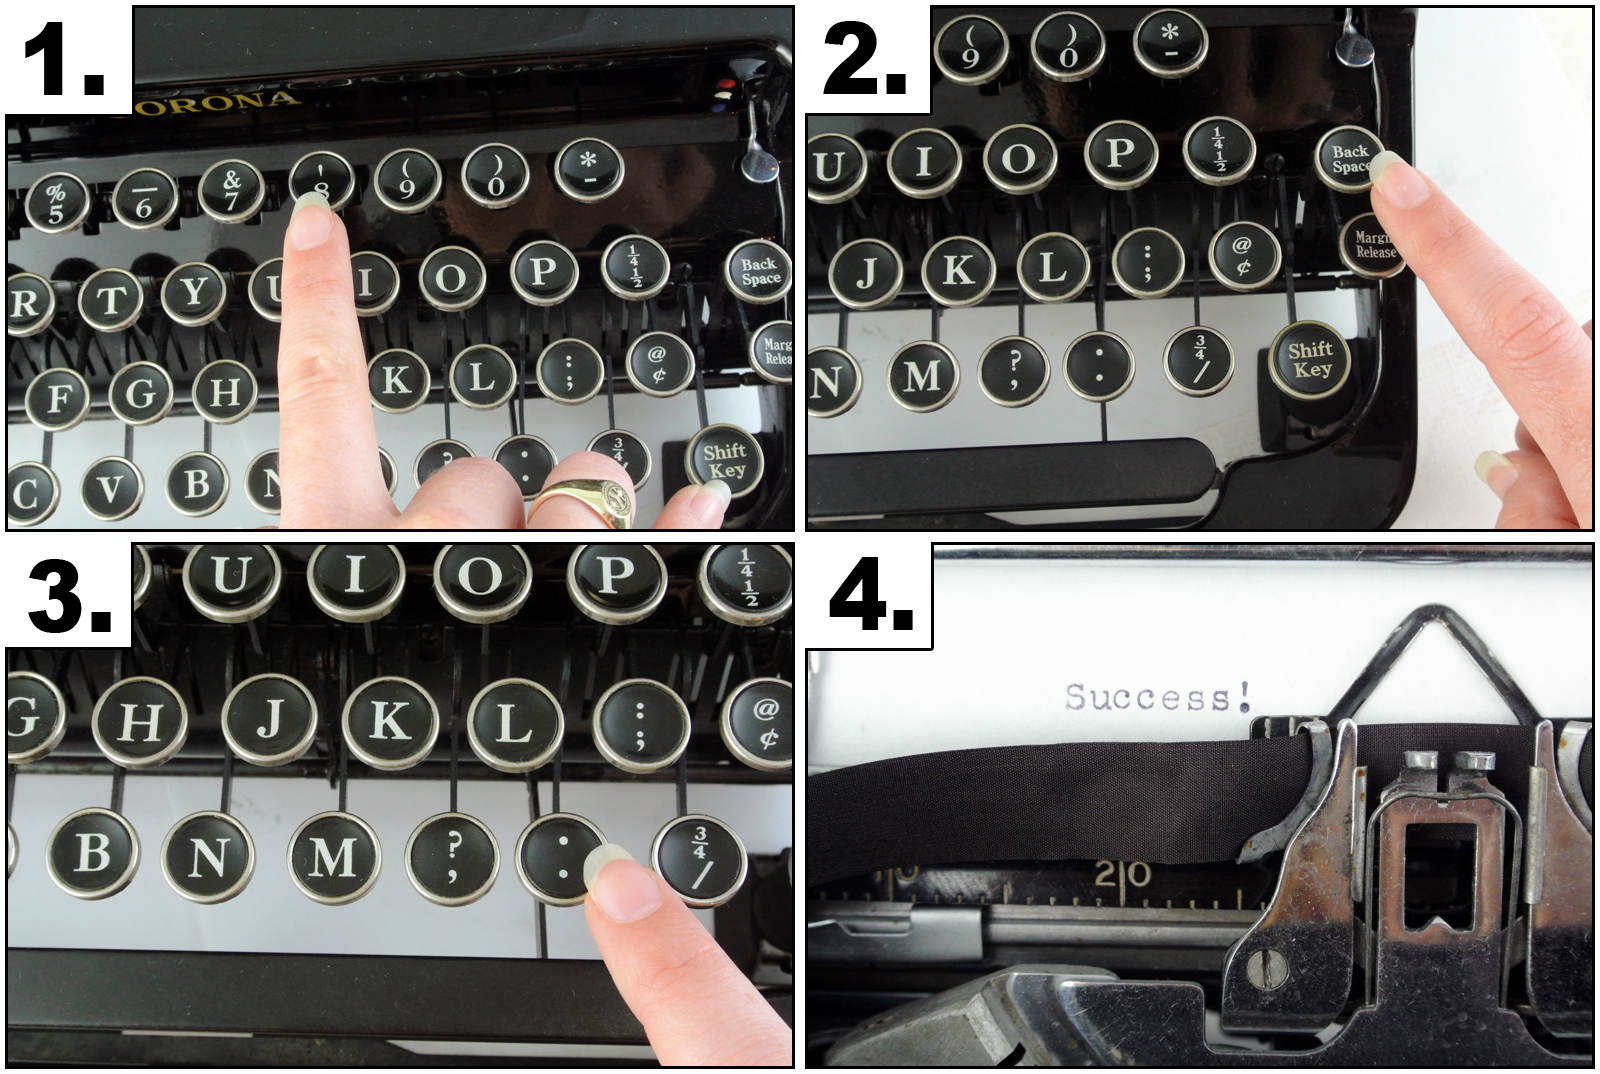
“Where the heck is the exclamation point!”
Don’t worry, the typists of yesteryear were just as fond of punctuation emoting as we are today. Even if you may not see an exclamation point on your typewriter’s available symbols, that doesn’t mean you can’t type one. Here’s how you do it:
- Type an apostrophe (‘) – for most typewriters this is Shift 8
- Use the backspace key
- Type a period on the same space as the apostrophe
- Rejoice!
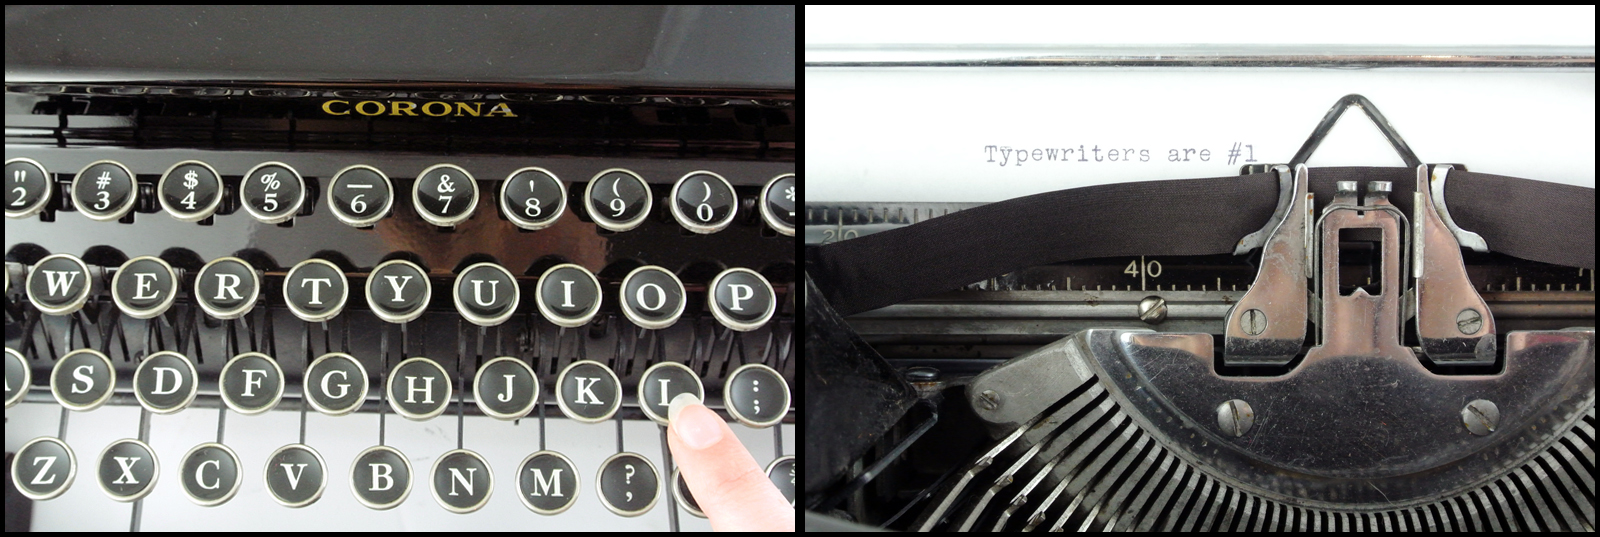
“And I don’t have the number 1, either!”
Don’t panic! Many typers don’t. These machines made the most of their space by using the lower case letter L any time they needed to type the first numeral. You’11 1earn to 1ove this stream1ined design feature.
“Why can I only type a few characters per line/What’s up with these margins?”
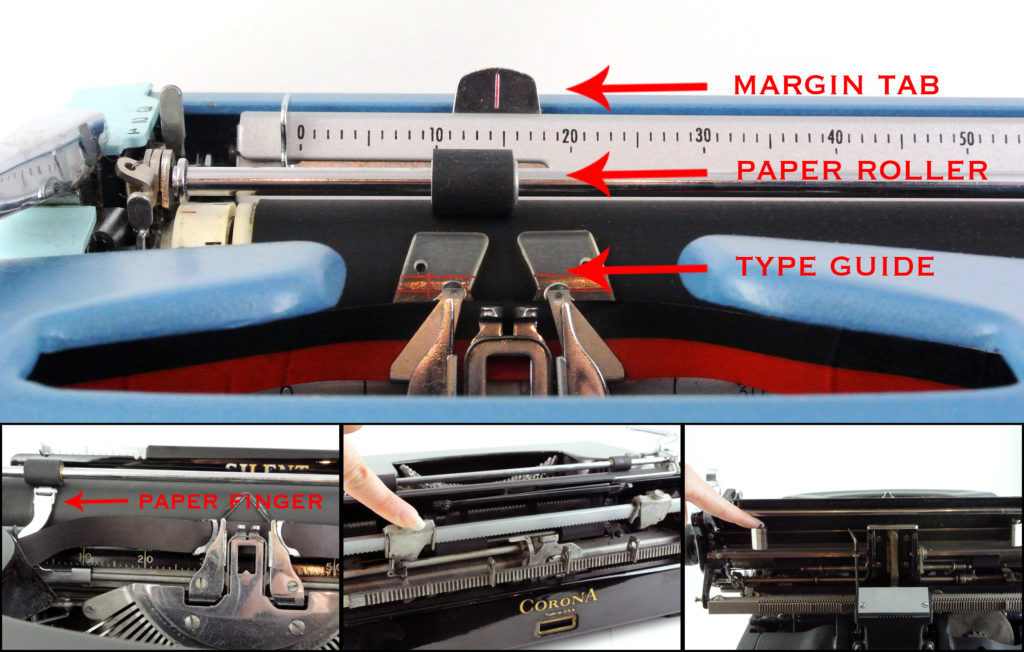
Ok, here’s where things get a little bit crazy. These machines were designed by fastidious individuals who, much to our appreciation, made it possible for us to laugh in the face of the standard 1″ margin whenever we pleased. Like a document in Word, the margins can be be set and reset on most any machine. If your carriage isn’t moving as far as you’d like before starting a new line, or letting you type too far along a page, resetting the margins will probably solve your problem.
For most machines, there are margin tabs along the paper table of the machine. Some might be behind the paper table. They may be plastic or metal. Here’s a general guide to setting them:
- Push down gently on the tabs and slide them to the far ends of the paper table: one on the left and the other on the right.
- Insert the size of paper you plan on using for reference.
- Center your type guide (the little metal window or point that shows you where your letters are striking as you type) where on the paper you want your left margin to begin.
- Gently slide the left margin tab towards your type guide. It should stop automatically, setting your left margin.
- Center your type guide where on the paper you want your right margin to begin.
- Gently slide the right margin tab towards your type guide. It should stop automatically, setting your right margin.
- Slide both the left and right paper fingers/rollers (these hold your paper down, either on a bar or on their own) to be in line with the margin tabs. If your typewriter has a ruler on the paper table and the bar that rests on your paper, you can refer to this for a more precise placement. These fingers/rollers provide visual cues for where your margins are as you type.
“I’m at the end of my line, but I only have a couple more letters left to type.”
Speaking of margins, there’s also a handy button on most machines called the “margin release” button. This releases your margins (which you set above) and lets you keep typing on the same line without keeping to the margin rules. So don’t stress; you don’t need to resort to weird hyphenations to finish off your end-of-line word.

Now that we’ve (hopefully) solved your typer troubles, here are some general tips in typewriter upkeep:
- Always save your spools. More often than not, we can supply your machine with a factory-ready ribbon, but there are occasions when we need to wind a roll of inked ribbon onto your existing spools. Failing that, or on particularly old or historic machines, we can actually re-ink the existing ribbon.
- Have your machine serviced every two years, or with the change of every ribbon. A machine that is being used will constantly lubricate itself and will be in better shape over the long haul, but even the most loved machines can use a little tune up and adjustment every once in awhile.
- Leave the complicated work to the experts. Respooling ribbon and general upkeep is something that may come easily with practice, but as anyone who’s opened a typewriter can tell you, these are complex machines. The intricate tinkering is best left to the repairmen and women.
Lastly, it’s important to note that to truly appreciate the satisfaction of employing a typewriter, you must be operating a well maintained machine. There is no comparison to be made between a typer that has been languishing in a basement for twenty years and a freshly lubricated, fully adjusted writing machine. So if you know that the typewriter sitting in front of you hasn’t been typed with or touched for at least the past 2 years, it’s likely time for a tune up. If this is the case, or if your issue wasn’t solved by any of the above tips, please feel free to drop us a line or give us a call (503.978.0333).